Uncategorized
What is a Good Mileage for Used Car ?

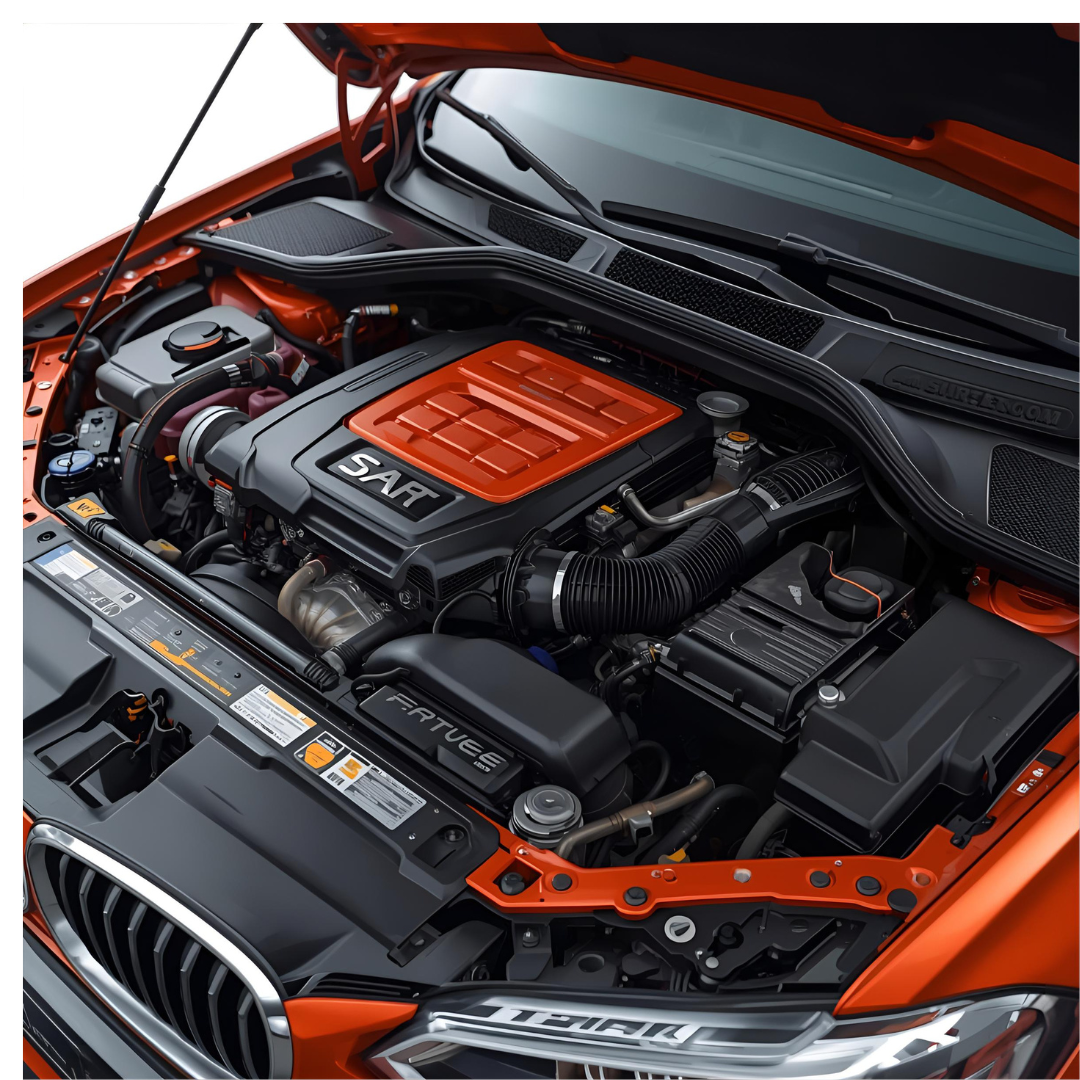
There are lots of factors you should consider when buying a used car. Factors like: the fuel type of the car, how strong the gearbox is, how good the engine is and the interiors too. But amongst the important things to be considered when buying a used car is the car’s mileage. Most buyers of used cars assume that buying a used car with low mileage is always better than buying one with high mileage. What, though, is the truth? On a used car, mileage means the measure of overall distance driven by a car. A knowledge of the mileage in a used car determines its market value and reliability. ’Is the mileage high or low?’. Why does this matter? What makes up a ‘good car mileage’ for a used car? This blogpost has the answer to those questions and more. Read on.
Good Mileage for a Used Car
The mileage for a used car is about 15,000km to 20,000km per year. A good mileage for a used car usually depends on the fuel type of the vehicle.
Important Mileage Red Flags to Watch Out For
There are some indicators that can help you discern if a used car is worth buying or not. Some of the important mileage red flags to watch out for are:
- Lack of good maintenance records: A car with low maintenance or service history is a red flag.
- A high mileage history in a short time is a red flag.
- Bad tire condition: A car with low mileage but brand-new tires is a red flag.
- Mismatched readings or odometer is another red flag.
- A car with reduced fuel efficiency and even unusual noise, is a red flag.
WHAT A GOOD MILEAGE SHOULD BE BASED ON THE CAR BRAND
The total mileage can tell a lot about the condition of the car, regardless of its brand. The mileage of most modern cars can be more than 200,000. The table below provides a simple description of what a good mileage is expected to be, based on the car brand.
| CAR BRAND | EXPECTED MILEAGE | YEARLY AVERAGE MILEAGE |
|
The mileage that is typically expected in Sedans is moderate. | About 11,000-18,000 miles only. |
|
The expected mileage for Diesel cars is usually high because of its purpose of use. | Mileage can be up to 23,000 miles especially those use by companies |
|
Low mileage | An average of about 10,000-15,000 yearly |
|
Low mileage is typical here | Just about 9,000-12,000 on an average |
|
A higher mileage is expected. | Mileage of about 12,000- 18,000 yearly on an average. |
HIGH CAR MILEAGE VS LOW MILEAGE
Statiscally speaking, neither high nor low mileage is better. Your choice of used car should be based on your budget and purpose of purchase.
- Low Mileage cars: Used cars with mileage around 9,000-12,000 depending on the car brand are considered ‘low mileage’.
- PROS AND CONS OF LOW MILEAGE CAR
PROS:
- The tendency of wear and tear is reduced on major car parts like the engine.
- The depreciation value is also slow.
- Repairs and servicing may not be immediately required.
CONS:
- It appears to be more expensive to purchase.
High Mileage Cars: Used cars of more than 18,000 miles per year are usually considered high mileage cars.
- PROS AND CONS OF HIGH MILEAGE CARS
PROS
- High mileage cars are less expensive.
- Common repairs and replacements may have been carried out.
- Mostly available.
CONS
- Costly repairs are more frequently done.
- Strong durability is not guaranteed.
Summary
From the Pros and Cons of both low and high mileage in used cars, we can rightly conclude that it is best and safer to get a used car with low mileage.
HOW TO VERIFY ACTUAL mileage: VISUAL INSPECTION, TOOLS, AND INITIAL INVESTIGATIONS
Before considering purchasing a used car, it’s essential to gather and prepare the necessary tools for a thorough mileage check. These tools include access to inspection history databases, service reports, and other resources that can provide a detailed history of the vehicle.
A careful visual inspection of the car can provide preliminary clues as to the accuracy of the stated mileage. Items such as wear on the pedals, steering wheel, and seats can provide indications of the vehicle’s actual use. This initial inspection, while not conclusive, can provide a first understanding of the car’s condition.
For an accurate and detailed check, it’s advisable to use professional services that can provide detailed mileage analyses through access to specialized and reliable databases. These services can compare the vehicle’s historical data with current information, thus providing a clear and detailed report. Furthermore, information on the payment of the last vehicle tax can provide further clues as to the seller’s integrity.
HOW TO VERIFY THE ACTUAL KM OF A USED CAR WITH MOT AND SERVICE HISTORY
Verifying the consistency between the number of MOTs performed, the age of the car, and the declared mileage is another crucial step. If the number of MOTs doesn’t match the declared mileage, it could be an indicator of tampering. In fact, analyzing the MOT history is a reliable method for verifying the mileage of a used car. This history can reveal any discrepancies between the mileage declared by the seller and the actual mileage, thus providing an important indication of possible tampering with the odometer.
Furthermore, examining maintenance receipts, i.e. service records (which, we remind you, are not mandatory, but highly recommended), can reveal discrepancies between the declared and actual mileage. If the numbers don’t match, it’s likely that the odometer has been tampered with. This analysis requires attention to detail and knowledge of the standard maintenance intervals for various car models.
How Many Miles Is Considered ‘Good’ Used Cars?
The mileage of a used car is always the biggest question: how many miles should it have? Here are all the answers and tips to avoid mistakes.
Buying a used car is always a big decision and, for many, it’s one of the most significant financial decisions they can make, given that it’s increasingly becoming an alternative to buying a new one. One of the most common questions buyers ask is: How many miles should a good used car have? We’ll explain this in the following paragraphs, reminding you that every used car has a story to tell and should be checked before purchasing. Therefore, it’s important to know how many miles a used car you’re buying can have, but it’s equally important to be able to evaluate the value of a used car with a high mileage by tracing its history. Let’s see how.
HOW MANY MILES ARE CONSIDERED ACCEPTABLE FOR A USED CAR?
It’s important to clarify that there’s no universal answer to this question, as the lifespan of a used car depends on various factors, including the brand, model, routine maintenance, road conditions, and the driving style of previous owners. However, we can get a rough idea of how many kilometres a used car can have based on its type, so we can better assess the checks to perform before purchasing. Generally speaking, here are the average mileage for different types of cars and some important considerations:
- City Cars and Small Cars: 100,000–150,000 km can be considered acceptable, as they are typically used for short urban trips. The mileage of these cars is generally not a major issue, as the condition of the interior can reveal much more. The problem could be clutch and transmission wear, which should be checked;
- Midsize and Sedans: 150,000–200,000 km can be considered acceptable, considering they’re often used for daily commuting. The same applies to city cars and small cars.
- Luxury sedans: 200,000–300,000 km can be considered acceptable, as these cars are designed for long highway journeys. It’s important to ensure all safety and comfort systems are functioning properly, as repairs can be expensive.
MPVs, off-road vehicles, and SUVs: 150,000–250,000 km can be considered acceptable if the car shows no signs of fatigue or wear due to heavy use or off-roading.
- Sports cars: 100,000–150,000 km can be considered acceptable, but it’s important to carefully check the maintenance and wear of the engine and high-performance components. It’s very likely they were driven under stressful conditions, on the track, or using non-original control units and parts. Therefore, keep an eye on the authenticity of the car beyond the mileage displayed on the instrument panel.
- Electric and plug-in: There is no reference mileage, beyond which an electric car could be risky to purchase. However, you need to be sure that all software updates and recalls have been performed, and that the traction battery’s efficiency is at an acceptable SOH level.
CHECKS TO VERIFY THE KM/H OF A USED CAR
Before purchasing a used car, it’s essential to perform some checks to determine whether the mileage is credible, or whether there are other issues that can be clarified by the seller or with the help of a trusted mechanic. Let’s start with the history of a used car, which can be easily checked online using the license plate number or VIN. Simply enter the chassis number (also called “VIN”), or the license plate, to find out everything about the used car you’re considering purchasing.
OTHER CHECKS TO PERFORM BEYOND THE KM OF A USED CAR
- Used car documents
Ask for the complete maintenance booklet and service receipts, which should show the mileage recorded at each service.
Check the vehicle’s chassis number to ensure it matches the vehicle documents and that there are no signs of tampering.
- Inspect the car
Check the interior for wear, such as the steering wheel, pedals, and seats. A car with low mileage should show minimal signs of wear and seats that are not sagging.
Examine the tires’ features and brand, comparing the dimensions to the vehicle’s registration document. If they are heavily worn or different, consider replacing them.
- Test drive
During the test drive, pay attention to any unusual noises or engine problems, which could indicate heavy use.
Evaluate the engine’s response and the smoothness of the transmission. A car with low mileage should run smoothly and without any hiccups or irregularities.
- Mechanic Inspection:
Before finalizing the purchase, have the car inspected by a trusted mechanic. This expert will be able to assess the vehicle’s overall condition and confirm whether the mileage is credible.
Practical Tips for Buying a Good Mileage in Used- Cars
- You may be concerned about the mileage of the car and its condition, but you should also vet the seller.
- Be sure of the model of car you want.
- Also be sure to find out about the insurance of the car.
- Your appointment should be at daytime in order to properly examine the engine and other parts.
- Check for steering and tire alignment.
- Test the brakes.
What else is important when considering a used car’s age?
Many factors are more important, when considering the age of a used car than just mileage. They are:
- The Motorway miles
If the motorway miles of the used car is 100,000 then you should be a little concerned, after examination.
- Low mileage issues
Having a low-mileage in used cars may seem happifying. But low mileage in used cars also have their down-sides. For example, Diesel-driven cars with low mileage but issues on diesel particulate filter, can cause frequent car problems. Also, a used car with low mileage may also tire issues due to infrequent usage.
- Frequently inspect Car
Go for frequent inspection. Irrespective of the mileage of your car, always have it checked by a mechanic in case of hidden issues like metallic rusting, and leaks.
- Confirm Service History of the Used Car
Be sure to have a comprehensive service history of the used car, in case of any large gaps.
Frequently Asked Question: Good mileage for a used car
- FAQ 1: What should be the range of good mileage in a 5-year-old car?
Based on the standard average of 10,000-15,000 miles per year, what will be considered as good mileage range for a 5-year-old car is 10,000 multiplied by the number of years driven. That’s 50,000 miles.
- FAQ 2: What is the best mileage to sell a used car?
There’s no best mileage to sell a used car. A good mileage depends on the make of the car, the history of maintenance and the model of the car. However, if you have the desire to sell your car, it is best to sell it since it gets 60,000 miles mileage.
- FAQ 3: If a car is properly maintained, does it matter what the millage is?
Actually, yes it does. The mileage of the car is usually a good indicator of how the car has been used and its value.
- FAQ 4: What range of mileage is too much for a used car?
A car mileage over 100,000 miles is usually seen as too high mileage.
- FAQ 5: How can I determine the mileage of my used car?
The average mileage of a car is 15,000 to 20,000 miles per annum. To determine the mileage of your used car, do a division of your odometer reading by the age of your car. If for example your car is 5 years old, a good range of mileage should be 50,000-60,000 miles.
- FAQ 6: What is the difference between a good, average and high car mileage?
The difference between a good car mileage from an average and high mileage is the range. Typically, a good car mileage will be about 12,000 miles per annum. While an average car, mileage, will be between 12,000 -15,000 miles per annum. For a high car mileage, the range will be more than 15,000 miles per annum.
- FAQ 7: What is mileage on a used car?
Mileage refers to the number of miles or kilometres the car has travelled per litre of fuel.
- FAQ 8: Can I go for a high-mileage Honda or Toyota?
Yes, you can. Both Toyota and Honda are popular car brands that are known for longevity and reliability. They both have strong- built and parts.
CONCLUSION
There is no set rule on what the best mileage of a used car should be. What you have just read is a guide on the standard expectation of what the mileage of a used car should be. Other factors though, can affect the average mileage of a used car. It could be the fuel type, the brand of the used car, and its maintenance history. Based on the brand of the car, for example, the average mileage of a Sedan car is about 10,000 to 15,000 miles. A used car with more than 100,000 mileage is considered high. Finally, if you desire to buy a used car, go for a car with low mileage, as cars with low mileage usually do not demand for more expensive care and servicing.

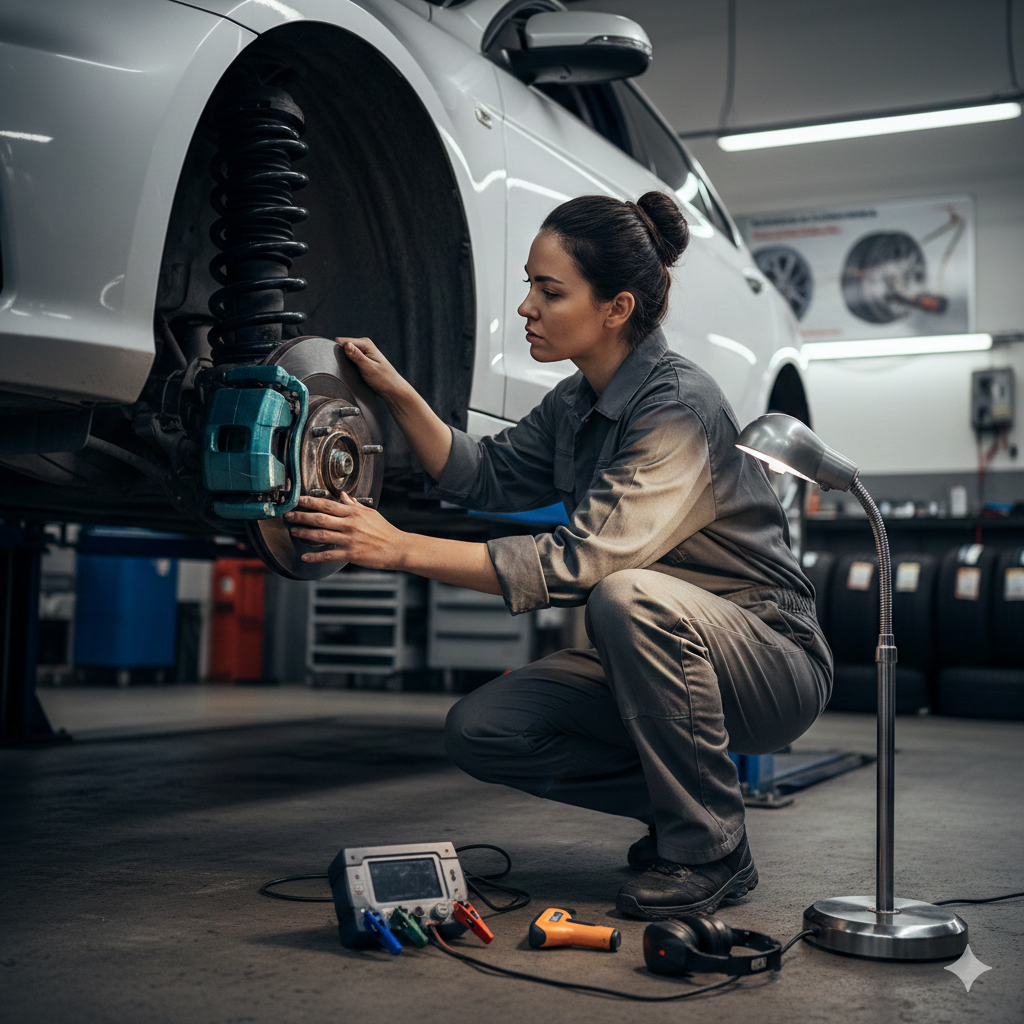
Wheel Bearing Noise: A tranquil cabin is one of the most overlooked benefits of modern driving. Your car is trying to tell you about the structural integrity of the car when it makes a low-frequency hum or a rhythmic growl. The “death knell” of a wheel bearing is usually that sound.
I won’t merely discuss “noises”; instead, we will delve into the anatomy of the hub assembly, the physics of friction, and the safety procedures necessary to manage this frequent yet hazardous failure.
A wheel bearing: what is it? (The Motion Anatomy)
You need to comprehend the component in order to comprehend the noise. A wheel bearing is a collection of steel rollers (tapered bearings) or balls (ball bearings) connected by a metal ring known as a “race.” The wheel hub, which joins the wheel to the axle, contains this small but powerful assembly.
It serves two purposes:
- Reduce Friction: It allows the wheel to spin with as little resistance as possible.
- Support Weight: It controls the lateral forces of cornering while supporting the vehicle’s entire vertical load.
Nowadays, the majority of autos use sealed hub units. These are first lubricated and sealed at the factory. Despite being designed to be maintenance-free, as soon as the seal is broken by heat, salt, or water, the lubricant degrades and metal-on-metal damage begins.
Sound Recognition: The “Aural” Test
Tyre noises can come from more than just bearings. Tyre “cupping,” brake drag, and bearing failure must all be detectable.
1. The growl with a low volume.
The most common symptom is a sound that is often compared to a propeller plane or a far-off motorboat. Starting at around 30 mph, it is a low-pitched, oscillating growl that gets louder as you accelerate. Unlike engine noise, this sound is correlated with vehicle speed rather than engine RPM.
2. The “Squeal” or “Chirp”
A high-pitched chirping or squealing sound may be produced by a bearing that has lost its lubrication but hasn’t begun to disintegrate. This is frequently confused with an indicator of brake wear. But if the noise doesn’t go away when you’re not braking, it’s probably the bearing.
3. The Uneven Pavement “Clunk”
When turning or going over bumps, you may hear a mechanical clunking or knocking sound if a bearing has reached the “play” stage, which means it has come loose during the race. This demonstrates that there is in fact a wobbling wheel on the spindle.
Using the “Sway Test” to Determine the Side
The Lateral Load Test is one of the best methods for a skilled wheel bearing diagnosis. During a test drive, skilled technicians do this to identify which side is malfunctioning.
- The Method: Sway the car gently from side to side, as if you were warming up tyres on a racetrack, while driving at a speed where the noise is audible (and safely away from traffic).
- The reasoning is that when the steering wheel is turned to the left, the car’s weight is transferred to the bearings on the right side.
- The diagnosis is that if the noise gets louder when you sway to the left, it’s probably the right wheel bearing. On the other hand, you’ve verified the location if the noise stops or becomes quieter when you unload that side.
Related Post:How Long do Brake Pads Last?
Why Do Wheel Bearings Fail?
Although wheel bearings are meant to last between 100,000 and 150,000 miles, they frequently fail far sooner. Comprehending the “Why” aids in prevention.
1. Impact damage.
The most frequent “sudden” cause is this. A tiny flat spot on the steel balls or a “dent” in the race can result from hitting a deep pothole, a curb, or getting into a small fender bender (a process known as brinelling). This small flaw eats away at the metal over the next few thousand miles, building to a loud growl.
2. Seal failure and contamination.
A bearing’s grease is its vital component. Water and road salt enter the assembly if the rubber seal tears or fractures. Because saltwater is so corrosive, it dissolves the grease’s chemical bonds, causing friction and intense heat.
3. Poor set up
The “Expertise” factor indicates an installation error if your bearing has just been replaced and is making noise once more. The bearing may “crush” if the axle nut is tightened with an impact wrench rather than a calibrated torque wrench, which could cause it to fail within a few weeks.
4. Oversized wheels and offsets
The physics of the load are altered by custom wheels with extreme offsets, or wheels that protrude far from the body. They function as a lever, applying tremendous pressure to the bearing’s outer edge that the engineers never meant for the vehicle to withstand.
The Risk Areas: Reasons Not to “Wait Until Next Payday”
Driving with a noisy wheel bearing puts your safety at risk. We must be honest about the dangers as a reputable guide.
- Wheel Lock-up: The metal parts may fuse together if the bearing heats up sufficiently. Your wheel will instantly stop spinning if this occurs at 65 mph, probably causing the car to spin out of control.
- ABS Failure: The ABS tone ring is built into the majority of contemporary wheel bearings. Your Anti-lock Braking System may malfunction or only occasionally operate as a result of the wobbling bearing shifting out of alignment with the sensor.
- Wheel Detachment: If the bearing is severely neglected, it may break down to the point where the hub assembly and axle separate. The wheel, brake calliper, and brake rotor can virtually fly off the car.
The “12 and 6” Test for Professional Diagnostics
You can use a floor jack to manually check your bearing at home if you think it might be damaged.
- Make sure the car is supported by jack stands and on a level surface before lifting it.
- To perform the shake test, place your hands on the tyre at the 12 and 6 o’clock positions. Make an effort to rock the wheel back and forth.
- The conclusion is that there should be no movement. There is a lot of internal wear in the bearing if you hear a “click” or wiggle.
- The spin test involves spinning the wheel with one hand while placing the other on the suspension’s coil spring. You will sense even the smallest vibration or “grittiness” through the spring if the bearing is failing because the spring functions as an amplifier.
Repair Theory: Swap Out in Pairs?
Whether it is necessary to replace both front and rear bearings simultaneously is a frequently asked question.
It is strongly advised even though it isn’t strictly required like it is for tyres or brakes. Wheel bearings are exposed to the same potholes, road conditions, and mileage. The right front bearing is typically not far behind if the left front bearing has reached the end of its useful life. You can avoid paying a second alignment fee and making a second trip to the shop by replacing them in pairs.
The Hub’s Physics: The Reasons Behind Bearing Failure Under Pressure
Four contact patches, each no bigger than a human hand, share the mass of a car weighing 4,000 pounds (1,814 kg). The point of intersection between that mass and motion is the wheel bearing.
The Centrifugal Factor of Force
The lateral G-forces put tremendous pressure on the bearing’s outer “race” when you turn a corner at 40 mph. These forces cause the internal steel balls to “skid” instead of roll if the bearing is even slightly damaged. Spalling is the process by which this skidding causes tiny cracks to form in the metal. The destruction is accelerated when spalling starts because the metal surface flakes off in tiny shards that function inside the bearing like sandpaper. This explains why the sound frequently starts out “gritty” or “gravelly” before intensifying into a roar.
Thermal Cycling
Extreme temperature fluctuations can affect wheel bearings. When braking heavily, they are just inches from brake rotors that can reach 500°F (260°C). The bearing hub receives this heat. Specialised synthetic grease made to keep its viscosity at these temperatures is used in high-quality bearings. Cheaper aftermarket bearings, on the other hand, frequently use inferior grease that “liquefies” and seeps out of the seals when heated, leaving the metal parts to grind dry against one another.
Detailed Progression of Symptoms: From Whisper to Warning
Most drivers don’t notice a wheel bearing until it is in its “terminal” stage. However, a keen ear can catch it much earlier.
Phase 1: Vibration “Vague” (0–500 Miles of Failure)
There may not be a lot of noise at this point. Rather, you experience a mild “numbness” in the floorboards or steering wheel. You get the impression that the pavement is a little rougher than it is. At this point, the metal has not yet deformed, but the internal grease has disintegrated.
Phase 2: The Sounds of Failure (500–1,000 Miles)
The traditional “drone” starts. The noise is frequently confused with wind or ‘tyre roar’. Driving on a smooth, recently paved asphalt road is a crucial way to distinguish the two. It is a mechanical vibration (the bearing) as opposed to a tread-pattern vibration (the tyre) if the noise is the same as it was when you were on old concrete.
Phase 3 (1,000+ Miles of Failure): The Cyclic Chirp and Heat
The chirp-chirp-chirp of the noise becomes rhythmic. This suggests that a flat spot has formed on the bearing. After a drive, the hub—the centre of the wheel—would be hot to the touch. A failing bearing may cause the lug nuts to become hot enough to burn, so proceed with extreme caution when checking for heat.
“False Positives”: What Other Noises Indicate a Poor Bearing?
Avoid these “imposters” before shelling out hundreds of dollars for a hub assembly.
1. “Cupping” or “Scalloping” tires.
The tyre bounces instead of staying firmly pressed to the road if your shocks or struts are worn. As a result, there are erratic wear patterns called “cups.” When these cups hit the road, they make a rhythmic growl that is almost exactly the same as a bad bearing.
- The Test: Slide your hand over the tire’s tread. Your tyres, not your bearings, are making the noise if it feels like the teeth of a saw—smooth in one direction and sharp in the other.
2. The differential pinion bearing
The differential has its own bearings in cars with all-wheel drive or rear-wheel drive. A howl that reverberates through the driveshaft is produced if the pinion bearing fails.
- The Test: A differential or transmission problem is more likely than a wheel bearing problem if the noise changes specifically when you release the gas pedal (coasting) as opposed to when you accelerate.
3. Interference with brake backing plates
A thin metal shield behind the brake rotor can occasionally be bent (possibly by a rock or during a tyre change). This metal shield produces a high-pitched metallic scraping sound when it comes into contact with the rotating rotor. It sounds scary, but it costs nothing to fix—all you have to do is use a screwdriver to bend the shield back.
Comparing Generations 1 and 3 in the Engineering of the Modern Hub
Over the past three decades, wheel bearings have undergone significant change. The complexity of the repair will depend on the type of vehicle you have.
- These are “press-in” bearings from Generation 1. Without the hub or bolts, they are simply the bearing itself. In order to replace these, a mechanic must disassemble the entire steering knuckle and push the old bearing out and the new one in using a hydraulic press that applies 10 to 20 tonnes of pressure. These are typical of many Hondas and Toyotas as well as older European vehicles.
- These are “bolt-on” hub assemblies from Generation 3. The ABS sensor, hub, and bearing are all integrated into one device. You simply unbolt the old unit from the knuckle and bolt the new one on. While the part is more expensive, the labor is much lower, making it a more DIY-friendly repair.
Environmental Impact: Why Some Are More Affected
Your wheel bearings are constantly being attacked by chemicals if you reside in the “Salt Belt” (the northern United States, Canada, or coastal areas). As a desiccant, road salt draws moisture into areas where it shouldn’t be. A “brine” that can eat through the rubber in a single winter season is produced when salt becomes trapped against the bearing seal.
Moreover, floods kills bearings without warning. The hot bearing cools quickly, creating a vacuum, if you drive through water deep enough to submerge your axles. Water can be drawn into the grease by this hoover and past the seals. Your bearings should be examined within 30 days of driving through a flood.
Expert Tools: What Experts Use to Listen for Silence
Electronic ears are used when a mechanic is unable to identify which bearing is defective (because sometimes the noise resonates so much that it’s difficult to pin down).
These tiny microphones are fastened to the suspension near each wheel. The mechanic wears headphones and flips a switch between “Channel 1, 2, 3, or 4” while driving. This allows them to hear the pure, boosted sound of each bearing independently. If you’re having problems finding the noise, some speciality shops offer this “acoustic mapping” service.
In-depth Technical Questions
Is it possible to simply “repack” my wheel bearings using grease? A: Yes, on many trailers and older cars (prior to the 1990s). The hub can be disassembled, the rollers cleaned, and new grease packed into them. Nonetheless, the bearings on 95% of contemporary automobiles are “sealed for life.” The unit needs to be replaced if they are making noise because the seal is broken.
Does a new bearing have a “break-in” period? A: Not at all. A bearing that has been installed correctly is instantly ready for full load. To make sure the wheel sat perfectly against the new hub, you should, however, recheck the torque on your lug nuts after the first 50 to 100 miles of driving.
I replaced my wheel bearing, so why did it fail only 10,000 miles later? A: “Double-Shear” or incorrect axle nut torque is nearly always the cause of this. The bearing’s “pre-load” is supplied by the axle nut. The bearing will jiggle if it is too loose, and the interior parts will be crushed if it is too tight. Never use an impact gun; always use a torque wrench.
Does my gas mileage change if I have a faulty wheel bearing? A: Yes, although typically only by 1% to 2%. Drag is produced by the increased friction. A bearing that is faulty enough to produce heat is essentially serving as a tiny brake that is applied continuously, making it harder for the engine to maintain speed.
Q: Can a car wash damage my wheel bearings? A: Indirectly. High-pressure “undercarriage blasts” can occasionally force water past aging seals. While a single car wash won’t kill a healthy bearing, consistently aiming a high-pressure nozzle directly at the center of the wheel is not recommended.
Can my wheel bearings be harmed by a car wash? A: Through indirect means. Sometimes, water can be forced past ageing seals by high-pressure “undercarriage blasts”. A single car wash won’t destroy a healthy bearing, but it’s not a good idea to constantly point a high-pressure nozzle straight at the wheel’s center.
Final Thoughts and Next Actions
Wheel bearing noise is an obvious indication that there is a problem with your car’s primary link to the road. By spotting the growl early on and doing the “sway test,” you can stop a little fix from becoming a serious roadside disaster.
Dashboard indicator lights meanings Explained;In essence, modern cars are rolling computers. The Engine Control Unit (ECU) of your vehicle is alerting you to a particular condition or issue when a light comes on. It is essential to comprehend the Colour Hierarchy, which works similarly to a traffic signal, before delving into particular icons:
- Red (Danger/Malfunction): Needs to be addressed right away. To avoid catastrophic failure or safety hazards, you should frequently pull over safely and turn off the engine.
- Yellow/Orange (Caution/Warning): Signals that a system is not functioning normally or that maintenance is imminent. Although the car can usually be driven, long-term neglect will cause damage.
- Green/Blue (Information): Verifies that a system is on or functioning as it should, such as cruise control or headlights.
Related Post:What Does an Intercooler Do?
Crucial Red Signs: Stop Right Away
The utmost urgency is symbolised by these lights. Serious accidents or engine replacement may ensue from ignoring these.
1. Warning of Oil Pressure
Icon: A droplet dripping from an oil can. This light indicates that the oil pressure has decreased, not that your oil is low. Oil cannot lubricate moving parts at the top of the engine without pressure. An engine will be destroyed in a matter of minutes by metal-on-metal contact. If this glows while you’re driving, stop right away.
2. Engine Temperature Warning
Icon: A wave-submerged thermometer. Your engine is getting too hot. A broken radiator fan, a malfunctioning water pump, or a coolant leak are frequently the causes of this. Driving an overheated vehicle can cause the engine block to crack or the cylinder head to warp. Before checking the coolant levels, turn off the engine and allow it to cool fully.
3. Brake System Alert
Icon: A circle inside parentheses with an exclamation point or the word “BRAKE.” This could mean that your parking brake is applied, that your brake fluid is hazardously low, or a significant hydraulic failure occurs. Your stopping power may be affected if this light is on and the parking brake is off.
4. Battery/Charging System Light
A rectangular battery with plus and minus symbols serves as the icon. The alternator isn’t charging the car, so it’s only using its batteries. The electrical systems, such as the ignition and power steering, will shut down in a short period of time. To save electricity, turn off the air conditioner and radio before visiting a mechanic.
5. Airbag Indicator
A sitting person with a big circle (airbag) in front of them is the icon. The Supplemental Restraint System (SRS) has a flaw. Your airbags might not deploy at all or might deploy suddenly in a collision. This is a serious safety issue that calls for specialised diagnostic tools.
Yellow Indicators: Warnings for Maintenance and Diagnostics
Although the car is usually safe to drive to a service centre, these lights indicate that a system is broken or deactivated.
Check Engine Light ( CEL )
Icon: An engine’s outline. Formally, this lamp is called the Malfunction Indicator Lamp (MIL). The On-Board Diagnostics (OBD-II) system is the cause of this. A malfunctioning catalytic converter or something as basic as a loose gas cap could be the cause.
- Steady Light: Time for a diagnostic examination.
- A severe engine misfire that is harming your catalytic converter is indicated by a flashing light. Reduce your speed and get help right away.
The anti-lock brake system, or ABS,
The letters “ABS” enclosed in a circle serve as the icon. When braking hard, the ABS keeps the wheels from locking up. The anti-lock pulse safety feature is lost, but your “normal” brakes will still function. This greatly raises your risk of skidding on slick roads.
Tire Pressure Monitoring System (TPMS)
An exclamation point and a horseshoe shape serve as the icon. There is under- or sometimes over-inflated air in one or more tyres. Tyre longevity, handling, and fuel economy are all impacted by low tyre pressure. Keep in mind that this light is frequently triggered by abrupt drops in winter temperatures due to changes in air density.
Traction Control (TCS) or ESC
A sitting person with a big circle (airbag) in front of them is the icon. The Supplemental Restraint System (SRS) has a flaw. Your airbags might not deploy at all or might deploy suddenly in a collision. This is a serious safety issue that calls for specialised diagnostic tools.
Glow Plug Indicator (Diesel Engines Only)
Icon: A “pigtail” or golden coil. Heat is necessary for diesel engines to ignite fuel. The glow plugs are warming up, based on this light. Before starting the engine, you should wait for the light to go out. It indicates an engine management issue if it flashes while you’re driving.
Typical Information Indicators
High Beam Indicator
Icon: A straight-lined, blue “jellyfish” shape. This merely verifies that your high beams are turned on. To prevent blinding other drivers, pay attention to oncoming traffic.
Cruise Control / Adaptive Cruise
Icon: A speedometer gauge with an arrow. Green indicates that the system is operational or that your speed is being actively maintained. Cars with adaptive cruise may change colour if they detect a car ahead.
Lane Departure Warning
A automobile swerving between dotted lines is the icon. When active, it is typically green. You are drifting out of your lane without a turn signal if it glows orange or rattles the steering wheel.
Expert Guidance on Dashboard Administration
- Consult the handbook; there are minor differences between manufacturers. The “source of truth” for your particular year, make, and model is your owner’s manual.
- The “Gas Cap” Rule states that you should stop and make sure your gas cap is tightened if your check engine light appears soon after you’ve refuelled. One frequent offender is a vacuum leak in the fuel system.
- Purchase a Basic OBD-II Scanner: You can purchase a Bluetooth scanner that connects to your car for less than $30. To ensure you know exactly what the mechanic is looking at before you enter the shop, it will provide you with the precise “P-code” (for example, P0420).
- Avoid Clearing Codes Too Soon: Disconnecting the battery to clear the light just obscures the “symptoms” from the computer, making it more difficult for a technician to identify the underlying reason.
Advanced EV-Specific Indicators and Powertrain
A new set of icons has appeared on the dashboard as the automotive industry moves towards electrification. These frequently have to do with regenerative braking and high-voltage systems.
The “Ready” Indicator
Icon: The word “READY” with a double-headed arrow underneath, usually in green. Electric and hybrid cars don’t make an engine noise to let you know they’re “on.” This light verifies that the car can move and that the high-voltage battery is charged. If this light is absent, the car’s contactors have probably failed to close, which is frequently the result of a high-voltage isolation issue or a discharged 12V auxiliary battery.
Turtle Mode (Power Limitation)
Icon: A turtle in a circle with a yellow silhouette. When the battery is extremely low or the system is overheating, EVs and hybrids enter what is officially called Reduced Power Mode. To prevent thermal runaway in the inverter or battery cells, the ECU restricts torque and speed. Finding a charging station or stopping right away if you spot the turtle is your top priority because complete shutdown is about to happen.
16. High-Voltage Fault
Icon: A yellow exclamation point inside a battery or a car with a lightning bolt through it. This light is the “Check Engine Light” for the vehicle’s electric system. It signals a problem with the DC-DC converter, the on-board charger, or the traction battery. High-voltage systems (typically 400V to 800V) can be fatal if tampered with by an inexperienced owner, so professional diagnosis is essential in this case.
Drivetrain and Gearbox Warnings
The second most costly part of your car is the gearbox. Ignoring these particular lights could result in a repair bill that is several thousand dollars.
Warning about Gearbox Temperature
Icon: A yellow “TRANS TEMP” text or a thermometer enclosed in a gear. Trucks and SUVs frequently exhibit this, particularly when towing. It indicates that the gearbox fluid is overheating, which causes the fluid to oxidise quickly and causes the internal clutches to fail. To allow the gearbox cooler to circulate fluid and reduce the temperature, stop driving and let the engine idle in either park or neutral if this lights up.
Four-Wheel Drive (4WD) / All-Wheel Drive (AWD) Errors
Icon: Four wheels and an axle in a drivetrain diagram or the words “4WD/AWD.” There is a problem with the electronic locking differential or the transfer case if this light flashes or remains yellow. Tyres with varying tread depths can cause this on many contemporary AWD systems, leading the computer to believe that the wheels are slipping all the time.
The ADAS This vehicle’s “eyes”
Modern cars use cameras, radar, and LiDAR to assist the driver. When these systems fail, the icons are often misunderstood.
Blind Spot Monitoring Off/Fault (BSM)
Icon: “Waves” between two cars, frequently accompanied by the word “OFF.” Your side-mirror sensors are not working if this light is on. The radar sensors behind the rear bumper corners are usually blocked by mud, snow, or heavy rain. Usually, cleaning the bumper fixes the problem.
Automatic Emergency Braking (AEB) and Forward Collision Warning (FCW)
Icon: A car inside a “starburst” shape or two cars colliding. The system is turned off if this is yellow. This typically occurs in bright sunlight or dense fog, which “blinds” the camera behind the rearview mirror. It indicates that the environment is currently too complicated for the AI to safely navigate, not that your car is broken.
Filter and Fluid Indicators (Special Attention to Diesel and Luxury)
Diesel Exhaust Fluid (DEF) / AdBlue
Icon: A liquid-pouring bottle or the words “DEF.” Since 2010, diesel cars have used DEF to cut down on nitrogen oxide emissions. You usually have a “countdown” (e.g., “500 miles until No Start”) if this light turns on. The car will go into “limp mode” and eventually won’t start until the DEF tank is refilled if it runs empty.
Diesel Particulate Filter (DPF)
Icon: A rectangular box with heat waves and tiny circles (soot) inside. Soot is collected from the exhaust by the DPF. This light indicates a blocked filter. In order to burn off the soot, this usually calls for a “regeneration” cycle, which involves travelling at highway speeds for 20 to 30 minutes. If you ignore this, the filter will get totally blocked and need to be replaced or cleaned by hand, which would be quite costly.
Brake Pad Wear Indicator
Icon: A circle with dashes on either side. This yellow indicator indicates that the actual brake pads have worn down to their minimal thickness, in contrast to the red Brake System light. A circuit has been completed by grinding down a tiny sensor that is implanted in the pad. Safe braking usually lasts 500 to 1,000 miles until you hit “metal-on-metal.“
The Technician’s Perspective: “Soft” vs. “Hard” Faults
The ECU records the appearance of a light as either a Hard Code or a Soft Code.
- Soft Codes: These occur sporadically. Maybe a pothole or a muggy morning caused a sensor to briefly receive an odd reading. After a few “drive cycles”—starting, driving, and stopping—the light might switch off by itself.
- Hard Codes: These signify a component failure that is permanent. Because the electrical circuit is physically damaged or the sensor is dead, the light will return almost instantly even if you use a tool to clear it.
Frequently Asked Questions (FAQs)
1. What caused my dashboard light to illuminate and then go out?
We call this an intermittent fault. Electronic control units (oecus) in modern cars are extremely sensitive. A single reading outside of a sensor’s programmed “normal” range—possibly from a large pothole, a sudden change in temperature, or even a brief drop in electrical voltage—may cause a light to illuminate. The computer may conclude that the issue has been resolved if the light remains off for a number of “drive cycles”—the starting, warming up, and shutting down procedures. Nonetheless, a technician can still read the code later because it is typically saved in the vehicle’s “History” memory.
2. Can I still pass the Smog Check emissions test if my check engine light is on?
No, in almost all jurisdictions. A glowing Check Engine Light (CEL) will result in an emissions test failure. Even if your car is running perfectly, the light indicates that the onboard diagnostic system cannot verify that the engine is burning fuel cleanly. Furthermore, using a scan tool to clear the light right before the test will still result in failure; the technician’s computer will recognise that the “Readiness Monitors” are not complete, and you will have to drive the car for a few days before you can get back in.
3. Although my tyre pressure light is on, my tyres seem to be in good condition. What’s happening?
Visual inspection is often insufficient because a tyre can be 20% under-inflated before it begins to appear “flat” to the unaided eye. In addition, the Tyre Pressure Monitoring System (TPMS) is highly susceptible to ambient temperature variations. For every 10 degrees that the outside temperature drops, your tyre pressure may drop by about 1 PSI.
Another typical reason is that a lot of contemporary vehicles also keep an eye on the spare tyre. No matter how good your four primary tyres are, the light will remain on if your spare tyre is low. Lastly, the light will flash for 60 to 90 seconds at startup and then remain solid if a battery dies. TPMS sensors are powered by tiny internal batteries that last 5 to 10 years.
4.Is it safe to drive while wearing a yellow “Traction Control” or “ABS” light?
It is “safe” since your primary hydraulic brakes will still be able to stop the vehicle. However, it is risky in an emergency. Without ABS, your wheels would lock up if you press the brakes too forcefully, which will cause skidding and a lack of steering control. Without traction control, you have a far higher chance of spinning off on wet or slippery conditions. You should drive more cautiously and extend your following distance until the system is rectified.
5. Why do all of my dashboard lights turn on and then turn off when I turn the key?
It’s just another bulb check. This safety feature is designed to let the driver know that every warning bulb is functioning as it should. If you turn your key to the “On” position and a specific light (like the oil pressure or airbag light) doesn’t momentarily illuminate, you won’t be informed if a serious problem occurs. This suggests that either the lightbulb is burnt out or the circuit is malfunctioning.
6. If my check engine light starts to flash, what should I do?
Get off the road when it’s safe to do so. A flashing CEL indicates a “catalyst-damaging misfire”. This signifies that raw, unburned fuel is being released into the exhaust system, where it will ignite inside the catalytic converter. The converter’s internal ceramic structure may melt due to high temperatures, requiring a potentially expensive repair.
7. Can the “Check Engine” and “Maintenance Required” lights be used interchangeably?
Avoid doing so. The Maintenance Required (MAINT REQD) light is merely a mileage-based timer that is usually programmed to turn off every 5,000 to 7,500 miles. It acts as a reminder to change your oil and rotate your tyres. Conversely, the Check Engine Light signifies that a sensor has identified a mechanical or electronic problem. The first is a symptom, and the second is a timetable.
8. The icon on my steering wheel is red and yellow. Am I still able to steer?
The steering wheel will probably become very heavy and challenging to turn, especially at low speeds, if the Electronic Power Steering (EPS) light is red. Although steering is still possible due to the physical connection to the wheels, the absence of “power assist” makes the car dangerous to maneuver in traffic. This is often caused by a blown fuse, a failing steering motor, or a weak battery.
Last Piece of Advice for Auto Owners
Always request a printout of the Diagnostic Trouble Codes (DTCs) when you take your vehicle to a mechanic for a dashboard light. As a “receipt” of the vehicle’s condition, this document guarantees that you are paying for the precise repair that the computer requested, not a string of “best guesses.”
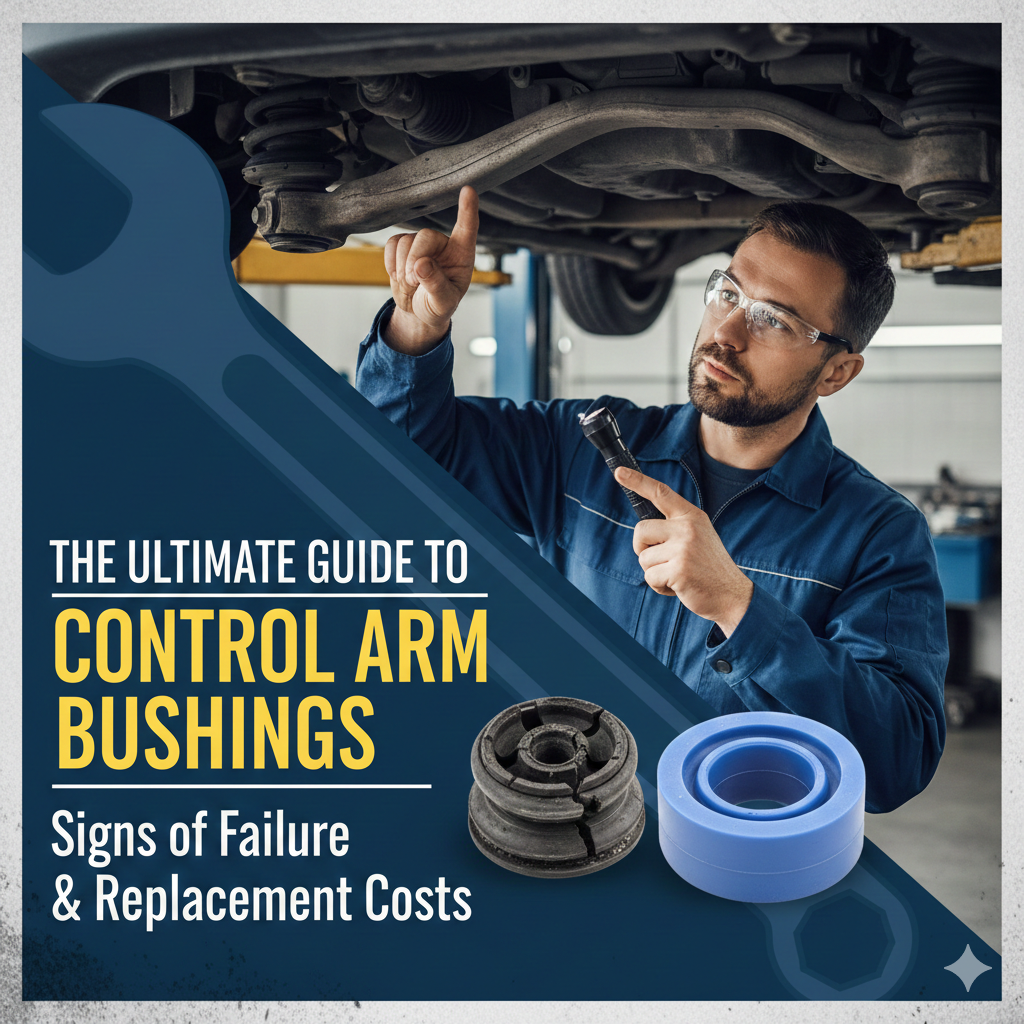
You’re probably dealing with worn control arm bushings if you’ve noticed an enigmatic “clunk” every time you hit a speed bump or if your steering seems to be acting on its own.
These parts are the unsung heroes of your car’s suspension system, despite their tiny size. They balance the challenging task of permitting movement while reducing vibration at the crucial point where your wheels meet the frame.
We’ll go over everything you need to know about control arm bushings in this extensive guide, from identifying a malfunction to figuring out repair costs.
Control Arm Bushings: What Are They?
To understand why they fail, you first have to understand what they do.The hinged suspension connection between the wheel hub and the chassis is called a control arm. The “joints” at the ends of these arms are called bushings. Usually, they are composed of an inner metal sleeve, a thick rubber or polyurethane cushion, and an outer metal sleeve.
Their main purposes are:
- Vibration dampening: By absorbing road noise and “harshness,” they prevent you from feeling every pebble on the road through the steering wheel.
- Pivot points: When the tyres respond to the road surface, they enable the control arms to move up and down.
- Alignment Maintenance: They guarantee that your tyres remain flat against the road by maintaining the wheel assembly in a fixed position.
Typical Indications of Bad Control Arm Bushings
Early detection of a failing bushing can prevent thousands of dollars’ worth of secondary repairs (such as early tyre wear or damage to the steering rack). Here’s what to search for:
A. Banging or clunking sounds
A metal-on-metal “clunk” emanating from the front wheel well is the most typical symptom. This typically occurs when:
- overcoming potholes or bumps in the road.
- swiftly picking up speed after stopping.
- Hard-braking
- Why it occurs: The metal inner sleeve is colliding with the mounting bracket because the rubber has been so severely compressed or cracked.
B. “Wander” steering
Your control arm bushings are probably shot if you have to constantly adjust the steering wheel to keep the car straight. As you drive, the control arm may move forward and backward due to rubber deterioration, altering the alignment of your wheels.
C. Uneven Wear on Tyres
Examine your tread. Your “camber” or “toe” alignment is incorrect if the outside or inside edges of your tyres are deteriorating more quickly than the centre. Because they enable the tyre to tilt at an improper angle, worn bushings are frequently the cause.
D. Steering Wheel Vibration
Excessive “play” in the bushings allows wheel vibrations to travel directly up the steering column. If your steering wheel shakes at highway speeds, it’s often mistaken for unbalanced tires, but the bushings are a frequent hidden cause.
If you’re planning to tackle this repair yourself, you can find high-quality, OEM-spec control arm bushings and the necessary press tools right here on Amazon. Investing in the right parts now will ensure your suspension stays quiet and your steering remains responsive for years to come.
Why Do Control Arm Bushings Fail?
Understanding the “Why” is essential to the Experience component of E-E-A-T. Bushings are constantly attacked by chemicals and mechanical forces, so they don’t just “go bad” for one reason.
Degradation of the Environment
Rubber is an organic substance. Over time, exposure to road salt, ozone, and drastic temperature swings results in a process known as “dry rot.” The rubber eventually starts to crumble, loses its elasticity, and develops microcracks. If you reside in a coastal area (salt air) or a “Rust Belt” state (road salt), your bushings will likely fail 30% faster than those in temperate climates.
The Silent Killer: Fluid Leaks
One of the most commonly ignored causes of bushing failure is leaks of engine oil or power steering fluid. Rubber is soluble in petroleum-based fluids. Your lower control arm’s bushing will soften and become “mushy” if your valve cover gasket is leaking oil onto it. This will cause handling problems right away.
“Bottoming Out” and Mechanical Stress
The control arm is pushed to the limit of its range each time you strike a curb or a deep pothole. The bushing is subjected to “peak load” as a result. Delamination is the term for the rubber being torn away from the metal sleeve by repeated high-impact incidents.
Related Post:8 BEST CAR SEAT MIRROR
Cost Analysis: How Much Should You Pay?
Depending on the make of your car and whether you visit an independent shop or a dealership, the cost of replacing control arm bushings can vary significantly.
The “Part vs. Assembly” Conundrum
The bushings are “pressed” into the control arm of many contemporary cars. Instead of just replacing the bushings, many mechanics advise replacing the entire control arm assembly.
- Reason: It may be more expensive to press out an outdated bushing than to replace the entire arm.
- Bonus: In the process, you receive a brand-new ball joint.
Cost Breakdown Estimate:
- $20 to $80 for a single bushing part
- $150 to $400 for the entire control arm assembly
- Labour (per side): $150 to $300 (usually 1.5 to 3 hours)
The “Bushings-Only” Replacement Procedure Step-by-Step
Here is the technical process if you have chosen to replace the old bushings instead of purchasing a brand-new arm in order to save money:
-
- Removal: The control arm needs to be supported in a hydraulic press after it has been removed from the vehicle. Make use of a “driver” that is somewhat smaller and a “receiver cup” that is somewhat larger than the bushing.
- The most crucial step is clocking: Mark the orientation of the old bushing before pressing it out. Many bushings are “indexed,” which means that the rubber contains voids that are intended to flex in a particular direction. The new one will fail in weeks if you press it in sideways.
- Cleaning the Bore: Clean the inside of the control arm loop with a wire brush or fine-grit sandpaper. The new bushing may seat unevenly and be nearly impossible to press in if there is any rust or debris.
- Lubrication: Use basic soapy water or a specialised P-80 lubricant. Steer clear of oil and grease since they can deteriorate the rubber or cause the bushing to “walk” out of the arm later.
The “Dry Park” Test for Advanced Diagnostics
You can do a “Dry Park” test, a method used by qualified diagnostic technicians, if you’re unsure if your control arm bushings are the cause of your noise.
-
- The Helper Method: Sit in the car with a companion while the engine is running (in park). Ask them to quickly turn the steering wheel back and forth.
- The observation is to watch the control arms while lying safely to the side. The bushing is compressed if the arm shifts horizontally prior to the wheels moving.
- The Pry Bar Method: Place a pry bar between the control arm and the frame while the car is safely supported by jack stands. Put pressure on it firmly. There shouldn’t be much movement. The rubber is damaged if the arm “walks” more than 1/8 of an inch.
Is Do-It-Yourself Replacement Worth It?
Replacing control arm bushings is a “Medium-to-High” difficulty task.
Tools You’ll Require:
- Jack stands and floor jacks.
- Breaker bar and socket set.
- Auto parts stores frequently rent bushing press kits.
- A torque wrench is essential for the safety of the suspension.
The “Critical Step” That Many Do-It-Yourselfers Overlook:
When the car is in the air, never torque the control arm bolts. Prior to the last tightening, the car must be lowered to its “ride height” (weight on the wheels). The rubber bushing will be “pre-twisted” when you drop the car if you tighten the bolts while the suspension is hanging, which will cause it to tear in a matter of weeks.
The Effect on the Geometry of Suspension
Alignment geometry is more important when control arm bushings fail than just noise. Three primary angles are impacted:
- Your “return-to-center” steering is controlled by the caster. The car feels “darty” or unstable at high speeds due to caster wandering caused by worn bushings.
- The wheel’s vertical tilt is known as camber. Negative camber, or the wheel leaning inward due to bad bushings, erodes the tread on your inner tyre.
- The most important factor in tyre life is the toe. A brand-new set of tyres can be destroyed in less than 500 miles if the bushings permit the wheels to point apart (toe-out).
The Crucial 50-Mile Check After Repair
Once the car is off the jack stands, the replacement of your control arm bushings is not complete.
- The Settlement Period: It takes a few miles for newly installed rubber bushings to “seat” into their final position.
- Re-Torque: After the first fifty to one hundred miles, it is strongly advised to check the torque on your mounting bolts. Massive vibrations can occur in suspension parts, and a bolt that wasn’t properly seated can occasionally come loose.
- Alignment Validation: Even if the car “feels” straight, get a professional alignment printout. In just a few months, even a 1/16th of an inch variation in toe-in can cost you $200 in tyres.
If you’re planning to tackle this repair yourself, you can find high-quality, OEM-spec control arm bushings and the necessary press tools right here on Amazon. Investing in the right parts now will ensure your suspension stays quiet and your steering remains responsive for years to come.
Engineering Details: Solid Rubber vs. Hydro-Bushings
You might come across “hydro-bushings” (fluid-filled) while shopping for control arm bushings. Maintaining the original ride quality of your car requires an understanding of the difference.
Hydro-Bushings: What Are They?
Hydraulic fluid-filled bushings are used in many contemporary luxury and European cars, such as BMW, Lexus, and Audi. By absorbing high-frequency vibrations that solid rubber cannot, these are intended to give a “premium” feel.
- The Failure Mode: A hydro-bushing will leak as opposed to solid rubber, which cracks. The internal fluid has leaked if you notice a dark, greasy stain on the bushing itself and you know it’s not an engine leak.
- The result is that the bushing turns into a “hollow” shell once the fluid is gone. This causes the front end to feel extremely “loose” and road noise to significantly increase.
- Replacement Advice: Unless you are ready for a much rougher ride, never swap out a hydro-bushing for an inexpensive, solid rubber aftermarket component.
The Control Arm Bushing’s Function in Contemporary Safety Systems
Your suspension is now digital rather than merely mechanical in the age of ADAS (Advanced Driver Assistance Systems).
Wear on your control arm bushings causes “slop” in the wheel position. The sensors used in modern cars for Electronic Stability Control (ESC) and Lane Keep Assist (LKA) depend on the wheels being precisely where the computer believes they are.
If your bushings allow the wheel to shift noticeably when braking, the ESC may “panic” and apply the brakes unevenly because it detects an irregularity in the wheel. Maintaining the condition of your bushings guarantees that the safety software in your car will function properly in an emergency.
If you’re planning to tackle this repair yourself, you can find high-quality, OEM-spec control arm bushings and the necessary press tools right here on Amazon. Investing in the right parts now will ensure your suspension stays quiet and your steering remains responsive for years to come.
FAQs, or frequently asked questions
Can I drive if my control arm bushings are damaged?
Yes, in theory, but it’s dangerous. The wheels shift backward under load, increasing your braking distance even though the car will still move. Additionally, the vehicle will not react consistently in an emergency swerve, which may result in a loss of control.
Should I swap out both sides at once?
Indeed. The same mileage and road conditions apply to suspension components. The passenger side is probably directly behind the driver’s side bushing if it has failed. You can avoid making a second trip for another wheel alignment and ensure balanced handling by replacing them in pairs.
What is the average lifespan of control arm bushings?
Factory rubber bushings typically have a lifespan of 40,000–100,000 miles. Climate, heavy city driving (potholes), and off-roading all have a significant impact on this lifespan.
Does a bad ball joint sound like a bad bushing?
They share many similarities. However, a control arm bushing produces a deeper “thud” or “clunk” when passing bumps or changing speeds, whereas a ball joint usually produces a higher-pitched “clink” or “pop” when turning the steering wheel.
Will I get better gas mileage with new bushings?
Yes, indirectly. Rolling resistance occurs when your bushings are so worn that your tyres are “scrubbing” against the road as a result of improper alignment. This friction is decreased by new bushings and correct alignment, which marginally raises your MPG.
Is it possible to stop the squeaking by simply spraying them with lubricant?
This is a temporary fix for the noise, but it doesn’t address the structural failure. If the wrong lubricant, like WD-40, is used, the rubber may actually deteriorate more quickly. Sprays based on silicone should only be used when attempting to temporarily quiet a “dry” bushing.
An overview of maintenance
Keeping your control arm bushings in good condition is essential to the longevity of your car. You can safeguard your tyres, your steering rack, and your safety by identifying the early warning signs of failure, such as clunking, wandering, and uneven wear.
-

 Uncategorized11 months ago
Why does my car shake when I brake?
-

 Maintenance & Repairs11 months ago
Car Radiator Repair Cost
-

 Driving Tips10 months ago
Catalytic Converter Transmission Cost
-

 Auto News10 months ago
3 Best Wireless Dash Cam for Car
-

 Maintenance & Repairs9 months ago
What Does an Intercooler Do?
-

 Driving Tips8 months ago
Engine Knocking Fix: Why Your Car is Pinging and How to Save Your Pistons
-

 Maintenance & Repairs9 months ago
Does Engine Oil Expire? How to Tell if That Old Bottle in Your Garage Is Still Safe
-

 Maintenance & Repairs9 months ago
Reasons Your Car Won’t Start or Crank (and How to Fix It Fast!)