
Maintenance & Repairs
Why Is My ABS Light On? 5 Common Causes, Safety Tips & Repair Costs


One of the most important safety innovations in automotive history is the Anti-lock Braking System (ABS). You may feel immediately alarmed when that amber or yellow “ABS” light appears on your dashboard. But maintaining the health of your car and your personal safety depends on knowing what this light means, how to troubleshoot it, and when it actually indicates an emergency.
The mechanical and electronic causes of an ABS warning light, how to diagnose the problem yourself, and what to anticipate in terms of repair costs and safety hazards are all covered in this thorough guide.
What Does the ABS Light Really Signify?
You must first comprehend what the system does in order to comprehend why the light is on. The purpose of the ABS is to keep your wheels from “locking up” when applying severe or emergency braking. Your wheels will stop turning and start to skid across the road if they lock. The driver is unable to steer once the vehicle is skidding.
Wheel speed is tracked by the ABS using a number of sensors. The system quickly pulses the brake pressure to that particular wheel—sometimes dozens of times per second—if it notices that one wheel is slowing down noticeably more quickly than the others, which is an indication of an approaching lock-up. As a As a result, you can steer around obstacles even during a panic stop because the wheel can continue to rotate while still applying the maximum amount of braking force.
The car’s computer has identified a problem with this subsystem and probably disabled it when the ABS light turns on.
The Most Frequent Causes of an On ABS Light
Although a fault code can be triggered by dozens of variables, the great majority of cases are caused by a few common culprits.
1. Failing wheel speed sensors.
The most common reason for an ABS light is this. Every wheel has a sensor that “reads” a notched ring on the axle or wheel hub. These sensors are typically magnetic or Hall-effect sensors. These sensors are always in contact with road salt, mud, brake dust, and debris because they are situated close to the wheels.
- The issue is that the internal wiring may fail as a result of the suspension’s continuous vibration and movement, or a sensor may get covered in dirt and be unable to detect wheel speed.
- The outcome is that the ABS module will turn on the light and turn off the system for safety if it receives no signal or an inconsistent signal from even one wheel.
2. Low levels of brake fluid
Your primary braking system and the ABS share a fluid reservoir. Air may enter the hydraulic lines if the fluid level falls too low.
- The Issue: Low fluid is typically brought on by either a leak in the system or very worn brake pads that need more fluid to push the pistons farther out.
- The outcome is that in order to avoid a complete hydraulic failure, the system detects a drop in pressure or volume and turns off the ABS.
3. An ABS Control Module that is not functional
The “brain” of the system is the ABS module. After processing sensor data, it instructs the hydraulic pump to pulse the brakes.
- The issue: The module may experience software bugs, corrosion on the connector pins, or internal electrical shorts, just like any other computer.
- The outcome is that the light will remain on indefinitely if the brain is unable to communicate with the rest of the vehicle.
4. Blown Fuses or Relays
To run its hydraulic pump, the ABS system needs a substantial amount of electrical power. It uses specialised fuses and relays to safeguard the circuits.
- The issue is that a short in the pump or a simple electrical surge can blow the fuse.
- The outcome is that the warning light is the only way the car can alert you because the system cannot operate without power.
5. Broken tone rings
The tone ring (or reluctor ring) is the notched metal ring that the speed sensor watches.
- The issue is that these rings may break, lose a “tooth,” or rust to the point where the notches are no longer visible.
- The outcome is that if the ring is damaged, even a flawless sensor will not be able to accurately “see” the wheel speed.
Is Driving While the ABS Light Is On Safe?
Whether or not it is illuminated by other lights will determine the answer.
Your regular brakes will still function if only the ABS light is on. Under typical driving circumstances, you can stop the vehicle as you always have. However, the anti-lock feature won’t be available to you. This implies that your wheels will probably lock up and you might lose steering control if you have to apply the brakes forcefully on an icy or wet road. You should take extra care when driving and get the system checked out as soon as you can.
Stop driving right away if both the red Brake Warning light and the ABS light are on. This combination typically denotes a significant loss of brake fluid or a major hydraulic failure. Your car’s braking performance will be seriously impaired or it might not be able to stop at all. Get the car towed to a mechanic.
DIY Diagnosis and Troubleshooting
Before visiting a shop, you can do a few checks at home if you have a mechanical bent.
Step 1:Examine the brake fluid.
Locate the brake fluid reservoir (typically a translucent plastic bottle close to the rear of the engine bay on the driver’s side) by opening your hood. Make sure the fluid lies between the “Max” and “Min” lines. Top it off with the appropriate DOT-rated fluid as directed by your owner’s manual if it is low.
Always keep a bottle of Premium DOT 4 Brake Fluid in your garage to ensure your levels stay within the safe range.
Step 2: Inspect the Fuses
To locate the ABS fuse, refer to your handbook. If the fuse’s internal metal link is broken, replacing it could fix the issue right away. However, there is an underlying electrical short that requires expert attention if the fuse blows again right away.
Step 3: Use an OBD-II Scanner
When the light turns on, the majority of contemporary cars store a particular “DTC” (Diagnostic Trouble Code). You can buy or borrow an ABS-capable scanner, but inexpensive code readers only check engine light codes. This will identify the precise wheel or part that is malfunctioning (e.g., “Code C0035: Left Front Wheel Speed Sensor”).
Check out this [Affordable ABS-Capable Diagnostic Scanner] to find your exact fault code at home: https://amzn.to/4k0WraA
Step 4: Visual Sensor Examination
If you can safely jack up your car and remove a wheel, look for the wire that leads to the wheel hub. Keep an eye out for frayed wires or a sensor that has a lot of grease or mud on it. Sometimes all it takes to fix an intermittent ABS light is to simply wipe the sensor with a rag and some electronic cleaner.
Before replacing parts, try cleaning the connectors with a Quick-Dry Electronic Contact Cleaner to remove road salt and grime: https://amzn.to/3YRXRu7
Projected Repair Expenses
The cost of repairs varies greatly based on the failed component.
- Top-off for brake fluid: $5–$15 (DIY).
- ABS Fuse Replacement: $5–$20.
- Wheel Speed Sensor: $150–$350 (including labor).
- ABS Control Module: $600–$1,500. This is the most expensive repair, as the part itself is costly and often requires “coding” or programming to the vehicle’s VIN.
- ABS Hydraulic Pump: $800–$2,000.
You can save significantly on labor by purchasing a Replacement Wheel Speed Sensor and installing it yourself: https://amzn.to/4b83RGB
Related Post:3 Best Wireless Dash Cam for Car
ABS’s Development: Going Beyond “Anti-Lock”
The ABS light hardly ever functions alone in contemporary cars. A malfunction in the ABS frequently causes a “domino effect” throughout your dashboard since the wheel speed sensors supply information to numerous computers.
The Traction Control System (TCS)
Most cars built in the last 20 years use the ABS hardware for traction control. If your wheels are spinning aimlessly on ice or wet pavement, the TCS reroutes torque to the wheel with grip by using the ABS pump to apply a small amount of braking force. If your ABS light is on, your traction control is probably disabled.
ESC, or Electronic Stability Control
Perhaps the ABS’s most life-saving component is ESC. It detects whether the vehicle is skidding sideways using yaw and steering angle sensors. After that, it applies individual wheel brakes to “pull” the vehicle back onto its intended course. Your car is much more likely to rollover or spin out in corners if your wheel speed sensors—the foundation of the ABS—don’t work.
The “Hidden” Culprits of Advanced Technical Causes
Although we discussed the “big five” causes, DIY mechanics are frequently frustrated by a few more obscure problems that can cause the light.
1. Inconsistency in the steering angle sensor (SAS)
Your steering wheel may be a little off-center if you recently had an alignment or struck a big pothole. The computer assumes a sensor is malfunctioning and turns off the ABS/ESC system if it detects that the wheels are moving straight (via the speed sensors) but the steering wheel is turned 10 degrees (via the SAS).
2. Different tire sizes
The ABS is set up to anticipate that each of the four wheels will rotate at a particular frequency in relation to the others. The diameter of the wheels will differ slightly if you replace just two tyres with a different brand or size, or if you place a ‘doughnut’ spare tyre on one corner.
- The maths: To keep up with a larger tyre, a smaller tyre needs to spin more quickly.
- The outcome is that the ABS module always detects one wheel spinning $5\%$ faster than the others. This is interpreted as a sensor error, and the light is turned on.
3. Magnetic Rings with Metallic Debris
A magnetic seal built into the wheel bearing has taken the place of the “toothed” metal tone ring in many contemporary vehicles. The magnetic field is distorted if tiny metal shavings from a failing bearing or a worn brake rotor adhere to this magnet. Instead of a clear speed signal, the sensor then “sees” noise or static.
The Expert Diagnostic Method: Mechanics’ Thought Process
When you take your car to a shop, they don’t just “guess and check.” They follow a rigorous protocol to ensure they aren’t replacing expensive parts unnecessarily.
The “Live Data” Stream.
Instead of just reading a static code, a technician will view Live Data using an advanced scanner. While driving the car (or spinning the wheels on a lift), they will concurrently monitor a graph of all four wheel speed sensors. If three sensors show $20 mph and the fourth shows $0 mph or fluctuates greatly, the technician has located the fault precisely.
Examining the Harness from the Back
If the sensor is brand-new but the code is still there, a specialist will “back-probe” the wiring harness. A multimeter is used to check the resistance ($Ohms$) and continuity of the wires that connect the wheel to the main computer. The “faulty sensor” is often a wire that has been chewed by a rodent or frayed by a piece of road debris.
Commonly Asked Questions
Can the ABS light turn on due to a bad battery? Indeed. Voltage has a significant impact on the ABS system. The system might not get the consistent voltage it requires if your alternator is broken or your battery is weak, causing a “Low Voltage” fault code and an illuminated light when it performs its self-check.
When the ABS light is on, will my car pass an inspection? A lit ABS light is considered an automatic failure for safety inspections in many areas. The ABS must be operational in order to pass since it is regarded as a primary safety system.
Does the ABS light indicate that my brake pads need to be replaced? Not always. The ABS light specifically keeps an eye on the anti-lock electronics, but extremely worn pads may cause the fluid level to drop, which would activate the light. Pad thickness is typically handled by a separate “Brake” or “Wear” light.
What causes my ABS light to flicker between on and off? Frequently, this is a “intermittent fault.” It typically indicates a tone ring covered in debris, a loose electrical connector, or a wheel speed sensor that is beginning to malfunction. Every time you start the car, the system rechecks itself; if the issue temporarily goes away, the light may go out until the issue is found again.
Is it possible to turn off the light by pulling the fuse? Pulling the fuse will shut off the system, but it will probably leave the light on while the car detects the missing circuit or turn on other lights, such as Traction Control. It’s not a suggested “fix.”
Conclusion
This guide provides a roadmap for resolution while addressing the driver’s immediate anxiety by highlighting the most frequent mechanical failures and making clear safety distinctions. Even though you can frequently drive while the ABS light is on, keep in mind that the system’s purpose is to save your life in an emergency. Don’t ignore it for too long.
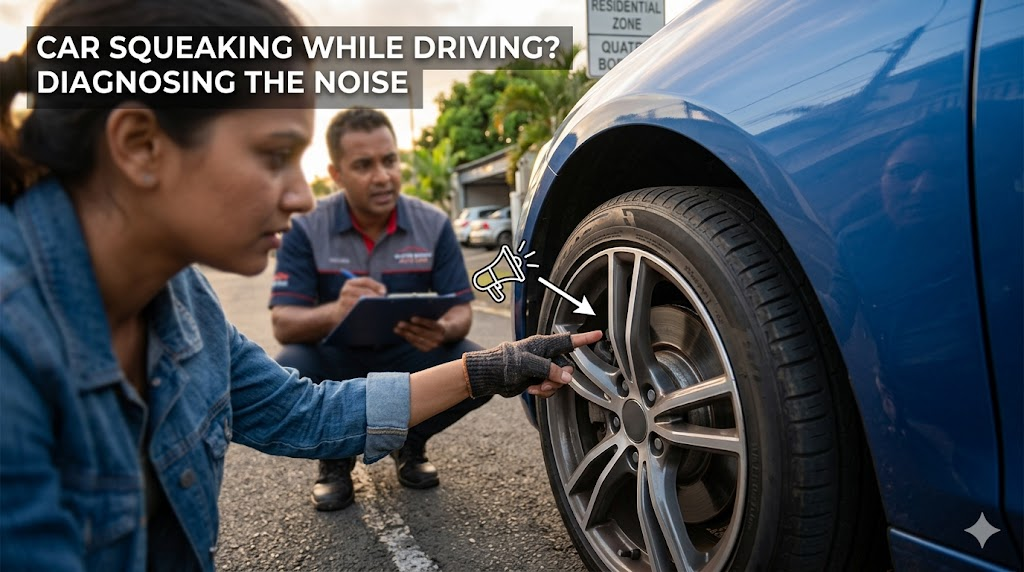
At first, a faint squeaking noise when driving can be overlooked. Maybe it just happens when you’re driving slowly or on bumps. But, at some point, you wonder if your ears are deceiving you.
Weird sounds are among the early signs that a vehicle requires maintenance. It could be from the wheel, the tire, or the suspension, or perhaps a loose bumper rattling on a rough terrain.
Whether your car squeaks over bumps, make noise when turning, or chirps faintly at slow speeds, the problem is usually wear, friction, or a loose part in your vehicle.
But just like the small squeak, your car may be trying to tell you that something needs attention particularly if it’s coming from the wheel, tire, suspension, or even the bumper area.
Why Cars Make Squeaking Noises While Driving
When metal, rubber, or plastic parts not well lubricated come into contact, they can make noise. The majority of squeaking noise is caused by the following:
- Rubber parts that are worn out
- Insufficient lubrication
- Dust between components
- Suspension (loose or old).
Squeaking at Slow Speeds: A Sign You Shouldn’t Ignore
If a squeal is noticeable mostly while you’re driving slowly, it may be the brakes or wheel bearings and not from the engine.
Brake pads have a little metal tab ( break squeaker tab) designed to make contact with the disc.
But when the pad gets too thin, it stays to make noise. This noise serves as a replace-me indicator; it has to be replaced.
Also, low-speed squeaking can be caused by:
- Dusting between the brake pad and rotor
- Worn wheel bearings
- Small stones picked up by the tire tread.
This can be difficult for drivers to detect because the noise usually disappears as you accelerate, giving you the impression that everything is fine.
Sometimes it may occur just sporadically, and that’s why the problem can easily be overlooked.
Tire and Wheel Problems That Cause Squeaking
When a car starts making a squeaky sound, many drivers always think that the problem is from the suspension. While that can be the case, the tire or the wheel could be also make same noise.
These parts rotate all the time and have road contact. Here are the most common tire- and wheel-related causes of squeaking:
Debris Stuck in Tire
One of the things that can make a car squeak is when debris gets stuck inside your tire tread. Tiny pebbles, fragments of gravel, or hardened mud may also stick within your tire treads.
As the wheel turns, these objects strike the pavement and can produce clicking noise.
You may notice:
- A constant noise that increases with speed
- The noise speeds up as you go faster.
Uneven Tire Wear
Tires wear down evenly over the whole surface. But when something is wrong, such as the alignment or pressure, the tread may wear in patches or at an angle.
This rough surface does not roll seamlessly, and so it can make a squeaking or humming noise when the tire spins on the road.
Uneven wear is commonly caused by:
- Wheel alignment is not right; one side of the tire is bearing more load.
- The tire is over-inflated or under-inflated, with wear in the middle or on the sides.
- Suspension components are worn, which is why the wheel lean just a little while you’re driving.
- You may also notice subtle vibrations through the steering wheel along with the noise.
The sound of uneven wear increases, but its harmful effects spread beyond noise to include reduced traction and shorter tire life.
Failing Wheel Bearings
Wheel bearings are important parts that make the wheels spin smoothly with little friction. They are within the wheel hub and bear the weight of the vehicle, allowing the wheel to spin.
When wheel bearings begin to wear out, they don’t spin freely as they should. This added friction can cause squeaking, grinding, or humming sounds, which may be louder as speed increases.
Signs of worn wheel bearings include:
- A squeak that turns into a grinding sound
- Noise that changes when you turn left or right
- The wheel is slightly loose.
That’s not something to ignore. A failed bearing can make the wheel wobble or lock up, which has an immediate effect on the steering and vehicle control.
This is a more serious matter than debris or tire wear.
Hard Tire Rubber
The rubber compound in tires will harden with age, especially if the vehicle is constantly exposed to heat or sunlight.
A hard tire rubber Rubber doesn’t grip or flex the same way, so you get those little squeaks or chirps when you roll your tires on clean surfaces.
Older tires, even if they have plenty of tread in them, are prone to this sort of noise.
Loose Wheel Parts
There are times when the noise isn’t caused by the tire surface at all but how the wheel is attached.
When nuts are poorly tightened, the wheel can move as it rotates, which could cause squeaks or creaks.
This can occur after:
- A recent tire change
- Poor wheel installation
- Driving with rusty lug nuts
Brake System: The Most Common Source of Squeaks
There is constant friction in your brake system, so it’s not surprising that the brakes are a frequent source of squeaking.
Common Brake-Related Causes:
- Worn brake pads
- Glazed rotors
- Lack of lubrication on caliper pins
- Dirt buildup on brake components.
When brake pads are worn, metal rubs against metal, and it produces a high-pitched squeal. Ignoring this noise can cause:
- Reduced braking performance
- Rotor damage
- Higher repair costs.
Can a Loose Bumper Cause Squeaking?
Modern bumpers are mounted using plastic clips and brackets. With time, these clips can:
- Wear out
- Crack
- Or loose after minor effects.
If it is, the bumper may be rubbing on the body of the car, which can cause a squeaking noise that sounds like suspension trouble.
Related Post:Remote Start Installation Guide: Mastery, Safety, and Pro Tips
Why Suspension Parts Start Squeaking
Suspension systems are dependent on rubber bushings for shock absorption. These bushings wear from:
- Heat from the road
- Exposure to water and dust
- Continuous compressing and stretching.
Once the rubber dries or tears, metal parts begin to rub directly against each other, creating that well-known squeak.
This is one of the most common reasons cars squeak over bumps.
Engine Bay Causes: Not All Squeaks Come From the Wheels
If the squeaks are coming from under the hood, it may be the belts and pulleys rather than the tires or suspension.
A failing serpentine belt can create a squeaking or chirping noise that varies with engine RPM. This occurs when the belt creeps on the pulleys because of wear or loss of tension.
Unlike suspension squeaks, belt noises often
- Surface when accelerating
- Are silent when you turn on the AC or turn the steering.
Weather
Cold weather can
- Harden rubber bushings
- Reduce lubrication effectiveness
- Increase friction between parts.
This is why some cars only squeak on a rainy day or in the morning. The noise may go away once the vehicle is warm, which makes it more difficult to identify.
How to Know Where the Squeak Is Coming From
Detecting the origin of a clicking or squeaking sound is not always easy because the car’s frame also allows sound to travel. If the noise happens:
- Over bumps is likely a suspension issue.
- When braking likely a brake problem
- While turning is steering or wheel bearings
- At startup, it is engine belts.
This kind of pattern-based diagnosis helps mechanics identify issues faster and prevents unnecessary repairs.
When a Squeaking Noise Becomes Dangerous
Not every squeak is urgent, but some are warning signs of mechanical problems. You should take the noise seriously if:
- It gets louder.
- You feel vibration in the steering wheel.
- The car pulls to one side.
- Braking distance increases
These symptoms often indicate wear in safety-critical components like brake pads or ball joints.
DIY Checks You Can Do Before Visiting a Mechanic
You don’t need special tools to perform a basic inspection.
Check for:
- Stones stuck in tire treads
- Visible cracks in suspension rubber parts
- Loose plastic panels around the bumper
- Uneven tire wear.
These simple checks can sometimes show the problem in minutes.
Why You Shouldn’t Ignore a Small Squeak
A squeaking noise often starts as a lubrication or wear issue. However, it can lead into the following:
- Metal damage
- Complete component failure
- Costly replacement instead of minor repair.
For example, replacing worn brake pads is relatively cheap. Waiting too long may also require replacing the rotors, which costs more.
How Your Driving Habits Affect Squeaking
Frequent causes include:
- Driving fast over speed bumps
- Carrying heavy loads regularly
- Ignoring wheel alignment problems.
These habits increase stress on suspension components and accelerate wear.
Why New Cars Can Also Squeak
Many people assume squeaks only happen in older vehicles. But new cars can also develop noise due to the following:
- Poor lubrication during assembly
- Dust buildup during driving
- Plastic trim rubs against panels.
This is why even vehicles with low mileage sometimes develop squeaks within the first year.
How Mechanics Diagnose Squeaking Noises
Professional diagnosis usually involves:
- Road testing the vehicle
- Checking suspension movement on a lift
- Inspecting brake thickness and wheel play
- They may also use specialized microphones like the STEELMAN 06600 ChassisEAR (Wired) to find out the exact location of the sound.
How Can I Prevent My Car from Squeaking?
Car squeaks usually don’t come from nowhere; they develop as parts wear down, dry out, or become loose. Here are ways to prevent it.
- Keep Your Suspension Components Lubricated
A lot of squeaking comes from dry rubber bushings and joints in the suspension. These are moving and flexible components, but in the absence of lubrication, they rub against metal and make that high-pitched sound.
Ask your mechanic check the following during a regular service:
All suspension joints and lubricate the needed parts.
- Replace Worn Brake Pads Early
When brake pads are getting weak, they make some sounds. Most modern brake pads even include a small metal tab that makes intentional noise as a warning.
If you notice any squealing while braking, do not wait too long. Replacing brake pads early, keeps your braking system quiet and prevents damage to more expensive parts, such as rotors
- Clean Tires & Wheels Regularly
Stones and dirts lodged in your tire treads or around the wheel can also cause you to hear squeaks or clicks as you drive.
Always:
- Checking your tires
- After traveling on a dirt or gravel road, remove any stones or dirt.
- Don’t Speed Over Speed Bumps and Potholes
When you drive on bumps, you put extra strain on your suspension, bushings, or the bumper. These things can make some of the parts to wear out faster, which in turn causes squeaks and rattles.
Slowing down over rough surfaces can help with the following:
- To protect the suspension components
- To reduce wear and tear in the long run
- To stop noises from forming in the first place.
- Wash Your Car, Especially the Undercarriage.
Dirt, sand, and grime from the road can gather under your vehicle and around its moving components. This dirt also creates friction, which may cause squeaking. To avoid this, wash under your clothes once in a while. It:
- Cleanse dirt
- Prevent rubber components from drying up
- Reduce wear on suspension parts.
- Fix Loose Parts
Sometimes that annoying sign isn’t a big deal, it’s just a loose panel, a worn-out clip, or a bumper not sitting right. It’s hard to tell when you look at the parked car, but then when you drive, all those little loose parts start rubbing and making noise.
Look out for little things like panels not lining up or a tiny noise when you close the door or trunk.
A little tightening here or replacing a few clips can nip the problem in the bud before that faint rattle becomes something you hear every single time you drive.
- Follow Normal Maintenance Regimens
Neglecting regular maintenance is how minor problems become major ones. Periodic checks give mechanics a chance to find:
- Worn bushings
- Loose suspension parts
- Brake wear.
Wrapping Up
If your car makes noise as you drive over bumps, when you’re driving at low speeds, or if you notice a chirping noise coming from a wheel or tire, don’t turn a blind eye.
These noises can be scary, but most squeaks don’t mean that the car is on the verge of a breakdown.
Often it’s a simple fix, like dry suspension bushings, rubber components that have a small piece of debris stuck in the brake, or loose nuts.
However, identifying the problem early can prevent expensive repairs.
We don’t replace our car battery unless we notice that it has become weak. Normally, a weak battery will struggle to start the car. Some go to the extent of changing the acid instead of getting a new one. It is quite understandable that a car battery will not last forever, and knowing when to change a car battery will save you from jumpstarting or being stranded in traffic. But do you know how often to replace a car battery?
Most modern vehicles use a 12V battery that powers the starter motor, lights, and all the electronics. If you own a petrol car, a hybrid, or an electric vehicle, then the battery is an important part that keeps everything running smoothly.
In an EV, the 12V battery functions as a buffer, smoothing out interruptions in power coming from the larger battery and provides a consistent flow of electricity.
How Often Should You Replace a Car Battery?
At least car batteries need to be replaced every three to five years. But the specific life expectancy varies based on driving style, climate, quality of battery, and maintenance of the electrical system.
If you go on a lot of short drives, your battery might not get fully recharged, which could shorten its life.
Regularly driving long distances in your car, however, is good for the battery as the alternator gets the time it needs to fully recharge the battery.
Why Car Batteries Wear Out Over Time
A car battery stores energy in the form of chemical reactions that take place between lead plates and a liquid called electrolyte. Those chemical reactions are less efficient with time.
The battery gradually deteriorates, so as it ages, it has a harder time cranking the engine or powering electrical devices.
Heat, vibration, and repetitive deep discharges contribute to this fading. This is the reason some car owners have to replace their batteries sooner than expected.
Signs You Need to Replace Your Car Battery
Once you notice any of the signs below, just know that it’s time to replace your battery.
Engine Cranks Slowly
Usually, if your engine takes longer time to start, it is the first sign of a weak battery.
A large current is pulled by the starter motor, and the battery may not deliver sufficient current if it is going bad.
Dim Lights and Electric Troubles
Dim or flickering headlights while idling may be a sign that the battery is having trouble holding a charge.
In this situation, the battery warning light shows on the dashboard. Although this could be an alternator issue.
When to Replace a Car Battery Before It Fails
Honestly, people don’t replace their batteries until there is an urgent reason to do that. Usually, you should change it if it’s older than four years, use the Voltage and Cold Cranking Amp to check it.
But, you should contact your mechanic to carry this action.
How Often Do Electric and Hybrid Cars Need Battery Replacement?
Batteries for Electric and Hybrid Vehicles
Electric and hybrid vehicles have two kinds of battery systems. A 12V battery pack provides the basic electronics on these vehicles, and electricity to run the motor comes from a high-voltage battery pack.
Knowing how these systems operate will help you understand when to replace the battery.
Hybrid Vehicles
Hybrid cars use an electric motor and a petrol engine. High-voltage batteries have a much longer lifespan than regular 12V batteries, typically 8 to 10 years.
However, the smaller, 12V battery in a hybrid is still on the same replacement schedule as it is in a PMS-based car.
Fully Electric Vehicles
The main battery pack in a fully electrics is larger. Usually, the battery is covered with a manufacturer’s warranty of 8 years or a defined number of kilometres.”
What affects battery life?
Certain factors can determine how often you should replace your car battery. They include:
Climate and Temperature
Temperature has a large impact on battery life. When exposed to high temperatures the battery fluid can evaporate at accelerated rate, which leads to internal corrosion and that drains a battery as time passes.
Strangely enough, batteries sometimes expire sooner in states with long, hot summers.
Cold Temperature
Cold temperatures cause a different problem. As the temperature falls, chemical reactions within the battery slow down, and so the battery can’t generate as much power, including the power it needs to turn over the engine.
That’s why so many batteries die on chilly mornings, even though they looked just fine the day before.
Driving Habits
The way you drive your car is also a factor in your battery life. Short and frequent journeys can stop your alternator from working at its best, prevents it from charging your battery.
In the long run, this will cause the battery to weaken which happens when plates inside the battery is covered with deposits of sulfates; it also makes them less capable of holding a charge.
Drivers who consistently take longer drives get more life out of their batteries than those who only drive a mile or two at a time.
Electrical Load and Accessories
Modern cars have more electronic systems. Infotainment systems, navigation screens, heated seats, sensors, and driver assistance features all draw power from the battery.
The more gadgets you have running, especially when the engine is not running, the more your battery will suffer.
The added electrical load will cause the alternator to run harder and this can cause premature failure.
How to Check if You Are Supposed to Change Your Battery
You don’t have to wait for it to die to replace it. You can know the battery status with a voltage test using a multimeter.
A good 12V car battery will read about 12.6 volts with the engine off. If this drops below this reading, perhaps, it’s time to replace it.
What Happens If You Ignore a Failing Battery?
A bad battery increases the chances of your car not starting. You could end up stranded in a traffic, or on a frosty morning, your car simply won’t crank.
When the battery is going bad, (weak or dying) the alternator can also be under strain, as the charging system is forced to work harder to maintain the battery.
How Often Should You Test Your Car Battery?
Most auto experts advise that car drivers should test their car battery at least once in a year, more often after the three year period has been exceeded.
As batteries get older, their capacity to hold a charge deteriorates. You cannot feel your performance declining by day, but a simple test can tell you when you are beginning to lose steam well before it actually becomes a problem.
Some auto parts shops and service centers will test your battery for free. This makes it easy to measure voltage, cold cranking amps, and battery health without the need for special tools.
However, if you live in a part of the world where the weather is very hot or cold you might want to go for a bit more cautious 6-month checkup.
High temperatures, as well as cold weather, demand more power from a battery and so do the rain and snow.
How Often to Replace a Car Battery in Different Driving Conditions
Hot climate and frequent use in a hot area might require a driver to replace their battery as early as three years.
Residents of milder climates who don’t drive all that much can get five years and perhaps even more from a good-quality battery.
Cost of Replacing a Car Battery
The price of a car battery replacement depends on your car make and model, as well as the battery brand and size you select.
Traditional 12V batteries are fairly cheap, whereas hybrid and electric battery packs are much more expensive due to their complexity.
Buying a good brand of battery pays off because it is less likely to go bad on time.
How to Extend the Life of Your Car Battery
Here are things to do that can make your car battery last longer
Don’t leave lights or accessories on with the engine off.
This prevents deep discharge that deteriorates the battery over time.
Also, driving your car on a regular basis helps. Long drives enable the alternator to recharge the battery.
Maintenance Tips for Car Batteries
Maintaining your car battery can prevent early failures and reduce the number of times you have to change it. Do these:
Clean the Terminals
Battery terminal corrosion impedes electrical flow. Test them every few months.
Gently brush with a small wire brush or a solution of baking soda, then dry completely to help ensure strong connections and stable voltage.
Secure the Battery
A loose battery holder will also vibrate on the road, and that can damage the plates inside the battery. Make sure the hold-down bracket is tight, and check it often to prevent premature failure.
Guard Against Extreme Temperatures and Protect From Heat and Cold
Hot and cold weather can also affect batteries. Always park (under a tree if you can) in the shade.
Any type of protection from harsh weather conditions would definitely be a plus for a longer lasting battery.
Don’t Let the Battery Drain
Turn off your lights, infotainment system, and accessories with the engine off.
A battery that discharges repeatedly is weak already. Ideally, you should get a new one.
Inspect Regularly
Check for swelling, leaks, or odd noises. Detecting minor problems early will save you from unexpected battery failure.
How Often to Replace a Car Battery for Older Vehicles
Older vehicles drain batteries faster as their electrical systems age and the charging systems are less efficient.
In these vehicles, you may have to replace the battery a little earlier than the three to five-year window that is typical.
Older cars need to be inspected more often, so if you notice flickering lights or have electrical issues that come and go, take notice.
Related Post:Why You Should Never Ignore Wheel Bearing Noise
How Often to Replace a Car Battery in Stop‑Start Vehicles
Autonomous stop-start systems on modern vehicles put more strain on the battery due to frequent engine shutdown and restarts.
These systems normally demand specialized batteries like AGM or EFB varieties.
While these are cyclic batteries and are made to be used in such a manner, they also need to be replaced after years of intensive use.
Choosing the Right Replacement Battery
When it’s time for a battery replacement, it’s important to choose the right size and type. Always adhere to the battery specifications recommended by the manufacturer, for example, voltage capacity and type of terminals.
Using the wrong battery may cause charging problems, warning lights, and poor performance.
Mistakes Drivers Make When Replacing a Battery
Using a Cheap Battery
Avoid cheap batteries as much as possible. You can get cheap or fairly-used batteries; but, don’t expect them to last. Go for quality brands and ensure that they are new because of the warranty.
Neglecting the Alternator or Charging System
A dead alternator can kill even a new battery just as it did the old one, and leave you stranded.
A battery and alternator work together. Make sure that the alternator is good, too.
Selecting the Wrong Type of Battery
If you choose a battery that isn’t suitable for your vehicle, it can affect the performance, and the battery life will be reduced.
Incorrect Installation
If the terminals are too tight or too loose, the battery or the electrical flow may be affected and cause the battery or electrical components to perform poorly.
Lack of Maintenance
Not cleaning or checking electrodes regularly can cause oxidation, poor connection, and reduced battery life.
Frequently Asked Questions About How Often to Replace a Car Battery
How long does a 12V car battery last?
The average shelf life of 12-volt batteries is 3 to 5 years. Environmental factors and driving habits may cause acceleration or deceleration of these time frames.
How do I know if I should replace my car battery if it’s still working?
If the battery is older than 4 years, it is recommended that you replace it.
Do electric car batteries fail?
Yes, but not as often. Electric vehicles have big battery packs, which are built to last many years, but their 12V batteries go through the same replacement cycle as traditional vehicles.
Conclusion
If you always have a hard start every morning during winter or summer, you should check your car battery.
A weak battery is one of the things that make a car not start; however, other things can still cause it like alternator problems or spark plugs misfiring.
Most batteries last between three and five years, but it depends on the usage, brand and general maintenance.
Watch out for these warning signs such as sluggish engine starts, flickering lights, or other strange battery behavior.
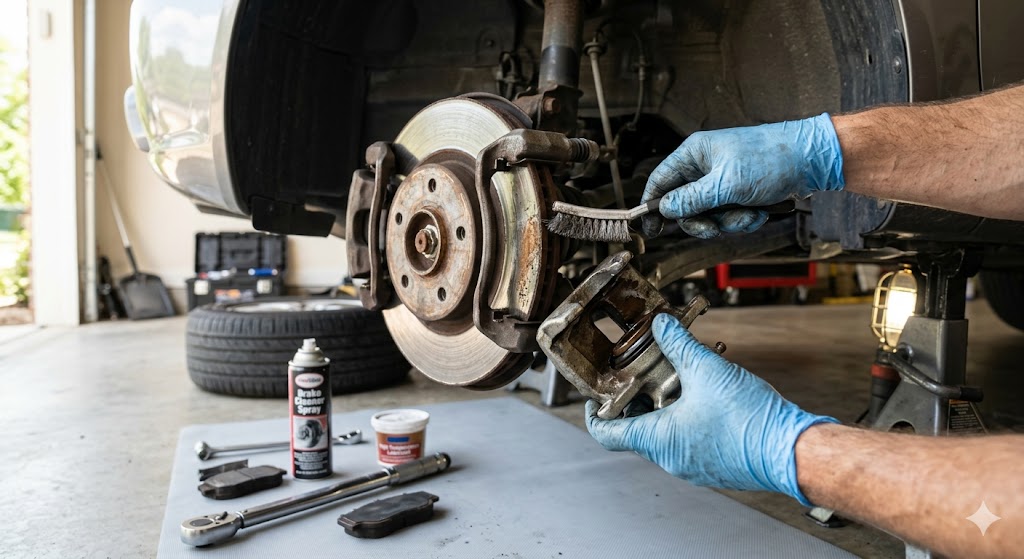
One of those slow damages in a car you may not notice early is a sticking brake caliper. The brake is working, yet the affected wheel continues to drag, create excess heat and wear the pads and rotors faster. At this point don’t you think you should learn how to repair a sticking brake caliper?
Dried grease, old brake fluid, or rust present on those parts can make them stick, and as you press the brake, it won’t release fully when you take your foot off the brake.
After awhile, that constant friction can wear down your brakes and cause the rotors to warp or cause uneven braking.
Not all sticking brake calipers should be replaced. Sometimes, just a simple cleaning and fresh lubricants or even some light part repair will get things working again.
In this article, I’ll show you how to identify the symptoms of a seized caliper, the causes of caliper seizure, how to fix the problem, and how to safely unstick and repair the seized caliper.
How Brake Calipers Work
Brake calipers are components of the hydraulic brake system. They squeeze the brake pads against the rotating rotor to slow down the car.
Brake fluid flows through lines, and when you step on the brake pedal, pressure is applied inside the caliper.
That pressure pushes a metal piston out. The piston pushes the inner pad against the rotor, and the caliper body slides out slightly to draw the outer brake pad as well.
Both squares press against the rotor simultaneously, to produce the friction needed to slow them down.
Now, when you lift your foot off the brake pedal, the pressure builds down in the system.
When the piston in the caliper or the caliper’s slide pins seizes, that is when things get complicated.
The wheel gets rubbed on as you drive, producing heat, wearing the brake pads on one side heavily, and most importantly stressing the rotor.
How to Tell If a Brake Caliper Is Sticking
Most drivers fail to detect the signs early, resulting in rotor damage and early brake wear.
Common symptoms of a sticking brake are the following:
- Vehicle pulling to one side while driving
- Burning smell after braking
- Excessive heat from one wheel
- Uneven brake pad wear
- Reduced fuel efficiency
These symptoms happen because the brake pad is rubbing on the rotor, even when you are not applying the brakes.
What Causes a Brake Caliper to Stick
Brake calipers are subjected to an extreme environment: heat, water, dust, and other contaminants all affect moving parts.
Here are some of the things that can lead to a caliper sticking or seizing:
- Corroded caliper piston
Brake fluid is a hygroscopic substance, and the result is that it pulls in moisture from the air over time.
As moisture accumulates inside the braking system, causing internal rust to form around the caliper piston and the walls of the cylinder.
Once rust sets in, the piston no longer moves smoothly. It may move on when you step on the brake pedal, but you have difficulty moving back when you take it off.
This is where the brake pad has light contact with the rotor, and it generates rub and heat.
In severe cases, the piston may also seize, which means the piston can not be pushed back into the caliper when performing brake service.
- Stuck or Dry Slide Pins
Most modern brake calipers are made to float or slide on guide pins. These sliding movements help both pads press evenly against the rotor while braking.
To keep this movement smooth, pins need to be clean and well-lubricated.
As they become old, the grease on these pins can dry up or wash. Dirt and moisture can then penetrate the pin holes, cause rust and friction inside.
If the caliper is seizing and no longer moves freely, one brake pad may remain pressed against the rotor while the other moves away.
This results in an uneven braking force and can cause your car to “pull” to one side while driving, and it will also cause uneven wear of your brake pads.
Stuck slide pins are the most under diagnosed cause of a sticking brake caliper and crushed brake pads, but one of the easiest to repair.
- Collapsed or Crushed Brake Hose
Brake hoses are designed to handle very high hydraulic pressures. The lining of the hose starts to degrade and collapse in some instances.
What happens is that when you press the brake pedal, the brake fluid is able to flow to the caliper and when you release the pedal, it can not flow back freely.
The trapped pressure keeps the piston extended, so the brake pad continues to drag on the rotor even without the brake pedal being held down.
It’s more difficult to detect because the hose can appear normal outside but is actually restricting fluid flow inside.
- Dirt and Dust
In regions with heavy rain, snow, or salted roads, this exposure is even more severe. Fine particles and salt buildup, among other things, can accumulate around caliper seals, slide pins, and pad contact points.
If these surfaces are not cleaned as part of your regular brake service, deposits can become hard and affect movement.
Rubber seals can also break down, allows additional contaminants to penetrate and speed up corrosion.
This type of contamination often develops slowly, which is why drivers may not notice any fault until the caliper is already sticking or causing uneven braking.
Tools Needed to Repair a Sticking Brake Caliper
Before you attempt to unstick a brake caliper, make sure that the tools are ready. You’ll need these tools.
- Jack and Jack’s stand
- Lug wrench
- Socket set
- Brake cleaner
- Caliper grease
- C-clamp or piston compressor
- Wire brush
- Protective gloves and eye protection.
Related Post:White Smoke coming from Exhaust: Is Your Engine Blown or Is It Just Steam?
How to Repair a Sticking Brake Caliper
Step 1: Raise and Wedge the Vehicle
Start with the vehicle on a level surface. Engage the parking brake and put wheel chocks on the wheels which remain in contact with the ground. Once the vehicle is raised, it keeps it from moving.
Raise the car with a hydraulic floor jack at the manufacturer’s recommended jacking points. Once the wheel is off the ground, put jack stands under the frame and lower the car.
Don’t ever get under a car that is simply resting on a jack. Hydraulic jacks can lose pressure or slip unexpectedly, so make sure that the stands are the ones holding the weight before you go under.
Step 2: Remove the Wheel
Lose and remove the lug nuts while the wheel is on the ground, then remove the wheel to access the brake assembly.
Put the wheel in a safe place where it won’t roll off or tip over.
Check the rotor whether you will see blue or dark heat spots, or uneven braking pad wear.
Step 3: Check the Brake Caliper
Don’t take anything out if you’re not sure if the caliper is the problem.
See if you can spin the brake rotor by hand. It should rotate with sunshine from the pads alone.
If the rotor is hard to turn or stops immediately, the brake caliper may be stuck in a semi-activated position.
This simple check confirms that the issue is not caused by something else, like a seized wheel bearing.
Step 4: Take Out the Caliper Bolts Safely
Find the bolts The caliper body is held in place by two bolts (one at the top, one at the bottom) at the rear of the caliper, which connect it to the steering knuckle or the caliper bracket.
Turn the steering wheel to expose the back of the caliper for easier access.
Use the correct size socket to prevent the bolt heads from stripping and then, while supporting the caliper with your opposite hand, pull them out.
Once the bolts are out, lift the caliper from the rotor carefully. Do not let it hang by the rubber brake hose.
The weight of the caliper can damage the hose or create internal cracks that can cause brake fluid to leak.
Use a piece of wire, a hook, or a bungee cord to hang the caliper from the suspension spring or other solid mounting point.
Step 5: Check and Service the Slide Pins
With the caliper off, remove the slide pins from the boots. Those pins should glide freely and cover with a thin layer of grease.
If they’re dry, rusty, they’re probably part of what’s making your brake caliper stick.
Use a brake cleaner and a clean cloth or wire brush, clean each pin thoroughly. Also, check the rubber boots if there are rips or hardening, as a torn boot allows moisture and dirt in.
After cleaning, coat the pins with fresh, high-temperature caliper grease and slide them back into the channels. Proper lubrication allows the caliper to center itself correctly when braking.
Use a C-clamp or a brake piston tool to press the piston back into the caliper housing.
Step 6: Inspect and Free the Caliper Piston
Now, look at the caliper piston. When pads have been unevenly worn or an individual pad is getting thin, then the piston may not retract.
Step 7: Clean the Caliper Bracket and Pad Contact Points
Brake pads slide within the caliper bracket on small metal contact points. Rust and debris often build up in these areas, then reduce the chance for the pads to move freely.
Remove the brake pads and clean the bracket surfaces with a wire brush and brake cleaner. The metal should be smooth and free of rust flakes or hardened dirt.
Apply a light layer of brake grease to the pad contact areas before reinstalling the pads. This prevents future binding and ensures even pad wear during braking.
Step 8: Reassemble the Brake Components and Test
Put the brake pads back into the position and reinstall the caliper over the rotor. Insert and tight the mounting bolts to the manufacturer’s torque specification to prevent it from loosening while driving.
Reinstall the wheel, hand-tighten the lug nuts, then lower the vehicle back to the ground before you fully tighten them in a crisscross pattern.
Before driving, sit in the driver’s seat and pump the brake pedal several times.
This restores hydraulic pressure and moves the caliper piston back into contact with the brake pads.
Skipping this step can cause a delay in braking for the first pedal press after reassembly.
Final Check Before Driving After
Repair
When you finish the repair, take the car for a short slow test drive and watch how it brakes.
The car should stop evenly and smoothly, there should not be any burning smell and no unusual heat should come from the repaired wheel.
If done properly, this repair will also extend the life of your brake pads, rotor, and hydraulic system.
How to Unstick a Brake Caliper Without Replacing It
In many instances, you can free up brake caliper parts without replacing the whole assembly.
Minor seize-up issues are usually fixed by cleaning and lubricating the slide pins.
Flushing out the old brake fluid can also help restore piston movement if moisture has caused rust.
If seals are torn or the piston is severely rusted, replacement is the best bet.
When a Seized Caliper Requires Replacement
Replace the caliper if:
- A piston is not compressible.
- Leaking brake fluid can be seen.
- The caliper body is cracked or badly rusted.
Driving on a locked caliper (seized caliper) can lead to brake failure.
Dangers of Driving with a Sticking Brake Caliper
One stuck caliper can cause constant friction and heat. This heat can warp the rotor, ruin brake pads and even cause brake fluid to boil.
Preventing Brake Caliper Seizure
The regular maintenance reduces the chance of brake problems in the future.
Flush Brake Fluid Regularly
Change the brake fluid every 2 years. Fresh fluid prevents moisture collection and rust inside.
Grease the Slide Pins When Servicing the Brakes
Clean the slide pins and grease every time you replace the brake pads.
Drive the Vehicle Regularly
Abandoned cars can develop rust in the brake lines and cause calipers to seize.
How Long Can You Drive with a Sticking Brake Caliper?
It is not advised to drive for a long time with a brake caliper sticking. Although the vehicle still stops, the braking can be erratic.
The longer you drive with the issue, the more damage occurs to the rotor, pads, and wheel hub.
FAQs
Can a brake caliper unstick itself?
Sometimes, minor rust or debris can loose while driving, but this is not reliable. If a caliper sticks once, it is likely to stick again.
How to tell if the brake caliper is sticking after replacing pads?
If you notice uneven pad wear or the wheel feels hotter than others after a short drive, the caliper or slide pins may be sticking.
Is it safe to lubricate brake components?
Yes, but only use high-temperature brake grease designed for calipers. Regular grease can damage rubber seals.
Final Thoughts on Repairing a Sticking Brake Caliper
A sticking brake caliper is unlikely to go away on its own. Once pinion/piston binding starts, the excessive heat and friction wears down the pads and rotor every time you drive.
To fix this, carefully lose the caliper, clean the moving parts, and make sure that the piston retracts fully.
If you follow the steps correctly, it won’t generate heat or smell that a dragging brake typically does.
Regular brake service also prevents this issue from reoccurring. At least, it is cheaper than replacing warped rotors or a seized caliper.
-

 Uncategorized11 months ago
What is a Good Mileage for Used Car ?
-

 Uncategorized11 months ago
Why does my car shake when I brake?
-

 Driving Tips10 months ago
Catalytic Converter Transmission Cost
-

 Maintenance & Repairs11 months ago
Car Radiator Repair Cost
-

 Auto News10 months ago
3 Best Wireless Dash Cam for Car
-

 Maintenance & Repairs9 months ago
What Does an Intercooler Do?
-

 Driving Tips8 months ago
Engine Knocking Fix: Why Your Car is Pinging and How to Save Your Pistons
-

 Maintenance & Repairs9 months ago
Does Engine Oil Expire? How to Tell if That Old Bottle in Your Garage Is Still Safe